In this iOptron SkyGuider Pro review, I’ll show you all the details of one of the most popular star trackers for astrophotographers. You’ll learn everything about the iOptron SkyGuider Pro’s features, the different kits and prices, and more!
I’m a professional astrophotographer and the iOptron SkyGuider Pro has been my go-to star tracker over the past few years. However, the iOptron SkyGuider Pro camera mount isn’t perfect. As much as I love it, there are a few aspects I wish iOptron would improve in future versions.
Keep reading to find out more!
-
- iOptron SkyGuider Pro – Overview
- iOptron SkyGuider Pro Features and Build
- iOptron SkyGuider Pro Polar Alignment
- iOptron SkyGuider Pro Mount Setup
- iOptron SKyGuider Pro Kits and Prices
- iOptron SkyGuider Pro vs. SkyWatcher Star Adventurer Pro 2i
- iOptron SkyGuider Pro vs. iOptron SkyTracker Pro
- Conclusion – Is the iOptron Skyguider Pro worth it?
iOptron SkyuGuider Pro – Overview
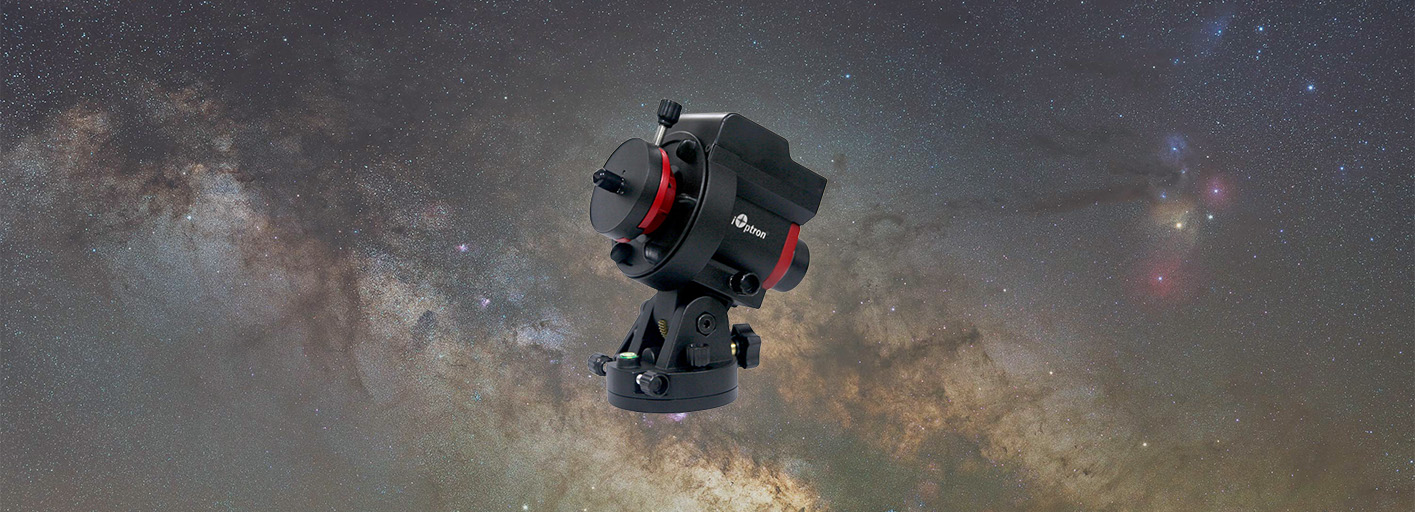
| After using all the most popular star trackers over the last few years, the iOptron SkyGuider Pro is my preferred option in most scenarios and my first recommendation if you are looking for a reliable and compact star-tracker mount. |
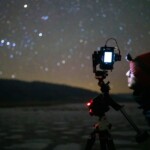
The iOptron SkyGuider Pro camera mount is perfect for both experienced astrophotographers looking for a portable mount and beginners looking to take their Milky Way photography to the next level.
What I love about this iOptron SkyGuiper Pro is how well-rounded and reliable it is. Whenever I have an important astro image to take, I know this star tracker will deliver the best results!

The iOptron SkyGuider Pro allows you to take some breathtaking images
On the flip side, there are a few aspects that iOptron should consider improving in future versions. Just to mention one, the EQ wedge is not on par with the build quality of the iOptron SkyGuider Pro. I recommend getting a better equatorial wedge by William Optics or even the SkyWatcher Star Adventurer Pro 2i EQ Wedge, which is what I use.
If you want to plan your astrophotography at a glance, I encourage you to download our Milky Way Astro Calendars!
GET THE CALENDAR WITH THE BEST DATES TO PHOTOGRAPH THE MILKY WAY IN 2026
You'll also receive our PDF guide to photographing the Milky Way!

iOptron SkyGuider Pro Features and Build
Since I started working with the iOptron SkyGuider Pro, I loved its robustness and design. This star tracker feels like it’ll last you a lifetime. And this not only goes for the external parts you can see, but also for the internals. The right ascension motor in this star tracker feels very sturdy as I’ve mounted heavy setups on it and even without the counterweight, it has worked quite well.
Stay with me while I review each feature in more detail!
Weight (Click to display)
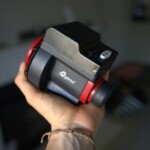
The iOptron SkyGuider Pro weighs 2lbs (1kg). This does not include the counterweights provided with the full package. This makes the iOptron SkyGuider Pro a very portable star tracker that you can take everywhere you go. There are lighter options, but they also have more limited specs.
Even though this star tracker is light, it doesn’t feel cheap. As I mentioned earlier, it feels reliable and sturdy.

The iOptron SkyGuider Pro is one of the best star trackers in the market
Payload
The payload capacity of the iOptron SkyGuider Pro camera mount is one of its main features, being able to support setups up to 11lbs (5kg). This star tracker is ideal for astrophotographers with normal and heavier setups, including DSLR and long lenses/small telescopes.
The added counterweight will help balance the whole setup and put less strain on the motor. If you are planning to use a heavy setup close to the iOptron SkyGuider Pro’s weight limit, I recommend using the counterweight.
Battery
iOptron made a really good call by putting an internal rechargeable battery in the SkyGuider Pro. This is very convenient, removing the need to carry AA batteries (like with SkyWatcher models) or an external power supply.
The battery duration is also great, lasting up to 20 hours. I’ve never ran out of battery in the middle of a shooting session.
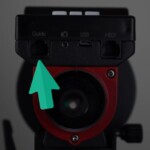
Polar Scope
The polar scope is another strong feature of the SkyGuider Pro. The scope is integrated and illuminated. In the list of best star trackers I recently wrote, this was one of the factors that set the SkyGuider Pro aside from its direct competitors like the Star Adventurer Pro or the Fornax Lightrack.

Polar alignment with the iOptron SkyGuider Pro is fast and easy thanks to its great polar scope
Polar alignment with the SkyGuider Pro is a delight when compared to other star trackers, and it’s even easier and more precise with the SkyGuider Pro iPolar edition, which uses a small camera, connected to your laptop, to polar align with precision.
To learn more about the iOptron SkyGuider Pro and astrophotography with a star tracker, I invite you to check out my Milky Way photography course!
Declination Bracket & Counterweight
The iOptron SkyGuider Pro ships with a declination bracket and counterweight, which are both made out of metal and make the whole system feel very solid.
The declination bracket and counterweight are designed to balance the whole setup if you are using a heavy camera and lens combo; this translates into better performance and less strain on the motor.
The declination bracket and counterweight in the iOptron SkyGuider Pro are easy to mount
I use the declination bracket and counterweights mostly when I’m shooting with a longer lens or doing complex techniques like a tracked Milky Way panorama. If the photo is simple and I use a lightweight setup, I use the iOptron SkyGuider Pro just with a ball head instead as this removes weight from my backpack and complexity while setting it up.
Build Quality
Overall, I’m very pleased with the build quality of the iOptron SkyGuider Pro. The body of the SkyGuider Pro is made almost entirely out of metal, with the only plastic part in the top black cover where the controls are located.

The iOptron SkyGuider Pro is well built and feels sturdy
As an astrophotography workshop leader, I’ve had many clients doing star tracker photography with this model and I’ve seen a general consensus when it comes to the SkyGuider Pro’s build quality.
The only piece that isn’t on par with the rest of the system is the equatorial wedge. Adjusting the altitude and azimuth with this EQ wedge can be cumbersome and that’s why most iOptron Skyguider photographers prefer the William Optics or the Skywatcher EQ Wedge paired with this tracker.
Autoguider
The SkyGuider Pro has an autoguider input and that’s great news for everyone looking into doing some deep sky astrophotography.

Using the autoguider function for the iOptron SkyGuider Pro will make tracking even more precise
Using the autoguiding function will make the SkyGuider Pro less portable due to the added equipment such as the guidescope, a laptop, etc. but this is to be expected.
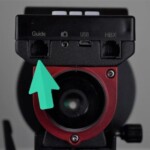
IOptron SkyGuider Pro Polar Alignment
The iOptron SkyGuider Pro polar alignment process is easier than with most other star trackers in its category. This is thanks to the well-thought polar scope, which is integrated into the body and is illuminated with a red light. This is one of the strongest suits of the SkyGuider Pro camera mount, and one of the main reasons I prefer this star tracker over its direct competitor, the SkyWatcher Star Adventurer Pro 2i.
Polar alignment is a crucial step to get the most out of any star tracker, and with the SkyGuider Pro, if the polar alignment is done right, you can safely get 5-6-minute exposures with wide-angle and medium focal length lenses. With longer lenses up to 400 mm, you can expect 1-2 minutes with an accurate polar alignment and good tracking conditions.
Polar alignment with the iOptron SkyGuider Pro is fast and easy.
The tracking performance in the SkyGuider Pro is really good. If you are mainly tracking with wide-angle lenses all the way up to 35mm, this astrophotography mount performs like a charm. When you start using longer focal lengths (80mm and upwards) is when you might start noticing star trails in some shots.
The SkyGuider Pro is still perfectly capable of doing some deep-sky astrophotography, but it’s not its main strength and you’ll probably need extra accessories like an autoguiding camera.
iOptron SkyGuider Pro iPolar Edition
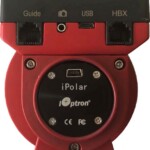
In 2019, iOptron released a revised version of the SkyGuider Pro adding the iPolar electronic polar scope. This iOptron SkyGuider Pro iPolar edition lacks a traditional polar scope, but instead, features a small camera which helps to do a more precise polar alignment.
If you are using a telephoto lens or a small telescope, or if you live in the southern hemisphere where precise visual alignment is harder to achieve, the SkyGuider Pro iPolar edition is a safe bet. You can purchase the iPolar electronic polar scope on its own to upgrade your SkyGuider Pro.

iOptron SkyGuider Pro with the iPolar module
To use the iOptron SkyGuider Pro iPolar mount you’ll need a laptop to connect it, reducing its portability. If you do wide-angle astrophotography or hike long distances, I would recommend purchasing the iOptron SkyGuider Pro Full Package instead.
For a more detailed guide on how to polar align your star tracker, read the article I wrote on how to do astrophotography with a star tracker.
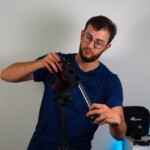
iOptron SkyGuider Pro Mount Setup
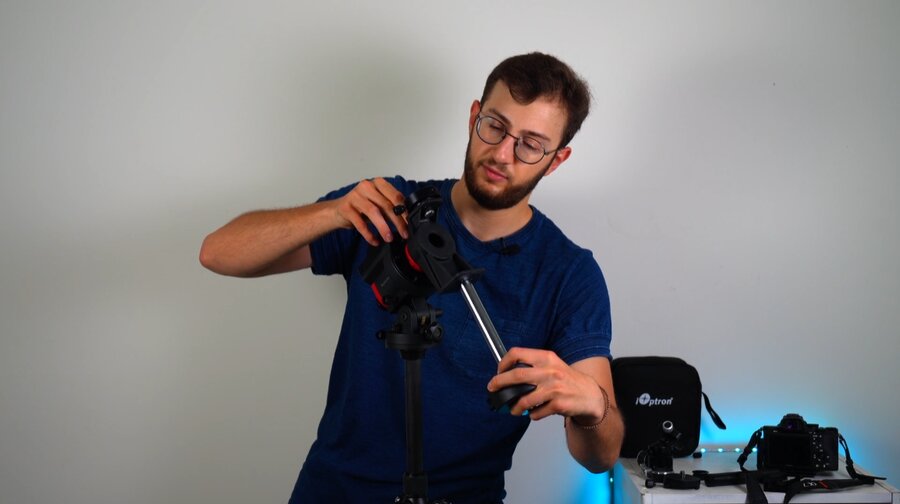
Setting up the iOptron SkyGuider Pro is fairly easy and simple. There are just a few steps you need to follow to do a precise star tracking and photograph epic Milky Way photos!
-
- Place your tripod and make sure that it’s leveled
- Mount the EQ wedge
- Slide and secure the SkyGuider Pro on the EQ wedge
- For heavy payloads, mount the declination bracket and counterweights. Otherwise, use a ball-head
- Mount the camera with its accessories.
- Do the Polar alignment.
- Choose your composition and start shooting!
You can see a full tutorial on how to use the iOptron Skyguider Pro with different setups, the best star-tracking techniques, and how to edit tracked images in my Milky Way Pro Tracking Course!
iOptron SkyGuider Pro Kits and Prices
In this iOptron SkyGuider Pro review, I want to help you find the best kit that will adapt to your needs. The SkyGuider Pro mount comes in 2 main kits:
iOptron SkyGuider Pro Full Package
The SkyGuider Pro Full Package retails at $488 but it’s often discounted and you can easily find it under $400. This is the kit I personally recommend since it’s the best value for money.
If you are photographing the Milky Way or want to start dipping your toes into deep-sky astrophotography, this kit is perfect and it will take you a long time to outgrow it. The package includes the following:
-
- iOptron SkyGuider Pro camera mount
- Built-in polar scope
- EQ wedge
- Declination bracket
- Counterweight
- Carrying bag

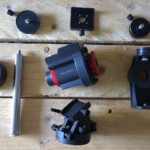
This is what comes in the box of the iOptron SkyGuider Pro Full Package
iOptron SkyGuider Pro iPolar
The SkyGuider Pro iPolar edition retails for $638. I would only recommend this kit to someone who mainly shoots astrophotography from their backyard or easy-to-access locations because the iPolar camera needs a laptop to work. The improved polar alignment you get out of the SkyGuider Pro iPolar allows you to use longer focal lengths and even do a more advanced deep-sky astrophotography.
This package includes the following:
-
- iOptron SkyGuider Pro camera mount
- iPolar electronic polar scope
- EQ wedge
- Declination bracket
- Counterweight
- Carrying bag
iOptron SkyGuider Pro vs. SkyWatcher Star Adventurer Pro 2i
The SkyWatcher Star Adventurer Pro 2i is the main competitor of this star tracker. If you compare the Star Adventurer Pro 2i vs. the iOptron SkyGuider Pro, you’ll notice some similarities like payload capacity and max. tracking time, but then they start to differ.
Battery: this is a win for the iOptron SkyGuider Pro because it features and internal rechargeable battery with a 20-hour run time. This is way more convenient than the 8x AA batteries you need to power the Star Adventurer Pro 2i and will prevent running into corrosion issues. (it happened to me with my Skywatcher).
Polar scope: this is another big point for the iOptron SkyGuider Pro. The polar scope is conveniently illuminated and you can choose between different brightness levels, while the polar scope on the Star Adventurer is a flimsy piece of plastic that’s easy to break and lose.
Equatorial wedge: Here the SkyWatcher Star Adventurer Pro 2i takes the lead. The EQ wedge in this star tracker is very well built; it makes the polar alignment really smooth. On the other hand, the EQ wedge on the iOptron SkyGuider Pro feels cheap and it’s not comfortable to use. The good news is that you can always upgrade the EQ Wedge on the iOptron and have the best of both worlds!

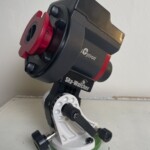
The iOptron SkyGuider Pro mounted on the SkyWatcher EQ wedge
Build quality and weight: Both trackers feel robust, but the iOptron SkyGuider Pro is lighter and more compact than the Star Adventurer Pro 2i, which makes it a better companion for traveling or hikes.
Considering all these differences, if you are undecided between the iOptron SkyGuider Pro and the Skywatcher Star Adventurer Pro 2i, my recommendation is to get the iOptron model. The Star Adventurer is an outstanding star tracker and you can capture fantastic images using it, but the iOptron is generally better in all the design features and functions that I commented above.
If you want to learn more, I encourage you to read the full SkyWatcher Star Adventurer 2i review article.
iOptron SkyGuider Pro vs. iOptron SkyTracker Pro
iOptron currently has two models of portable star trackers in its lineup: the Skyguider Pro and the SkyTracker Pro. They are both designed to satisfy different needs.
The iOptron SkyGuider Pro (the one I’ve been reviewing in this article) is bigger and heavier, this makes it more stable and better suited for heavier setups. This model will also provide better results if you try to do complex tracked Milky Way panoramas, mosaics, or deep sky astrophotography.

The iOptron SkyGuider Pro (right) is more suitable to heavier setups than the iOptron SkyTracker Pro (left)
The SkyTracker Pro (the younger sibling) is designed to be even more portable. It’s lighter, has a lower payload capacity and it’s better suited for lighter setups and simple Milky Way images. This star tracker is the perfect companion for someone who goes on long hikes to find the perfect photo.
iOptron SkyGuider FAQ
Throughout this article, I’ve tried to cover all the main features of this tracker. Below, you can find the most frequently asked questions about the iOptron SkyGuider Pro.
Conclusion – Is the iOptron Skyguider Pro worth it?
| The iOptron SkyGuider Pro is one of the best portable star trackers in the market. The build quality, the ease of use, and the tracking capabilities make this star tracker one of the favorites for most astrophotographers. There are some things to improve in this tracker, like the EQ Wedge, but after using it extensively over the past few years, I can safely recommend it. |
If you are planning on buying the iOptron SkyGuider Pro camera mount, I suggest you go for the Full Package, this kit is the best value for money. If you mostly do astrophotography from your backyard and you want to photograph deep-sky objects, I suggest you invest in the SkyGuider Pro with iPolar.
My only complaint about this star tracker is the EQ wedge; the quality is not on par with the rest of the SkyGuider Pro and I recommend you get a different one like the William Optics model.
I hope you found this iOptron SkyGuider Pro review helpful and, if you are ready to learn more about the iOptron or tracked photography, check out my Milky Way Pro Tracking Course! 😉
Happy Captures!


Dan, I am want to go one time to well to purchase as astrophotography tracker. I am looking at the iOptron SkyGuider Pro, but wondering if my shoot desires of the milky way would require to go to the next step up to the Benro Polaris mount. I would like to not only take shots of the Milky way, but panoramas, as well as a timelapse fixed on the milky way to capture the earths rotation. Not sure if I am asking too much for the iOptron.
Good question! The iOptron SkyGuider Pro can do wide-angle Milky Way shots and timelapses, but it doesn’t have the panning/tilting capabilities that the Benro Polaris has to do tracked panoramas. The Polaris is a huge help when it comes to timelapses with star tracking, and it really elevates your images. It’s not the easiest to master, but I have a Benro Polaris course that covers everything you need to know! 😊