| IMPORTANT NOTE: Topaz Denoise AI is now part of Topaz Photo AI and can no longer be purchased as standalone software. You can use this article to learn how to use Topaz Denoise AI if you already own it. Note that Topaz Labs is not going to release any new updates for this software. Read our Topaz Photo AI review article to learn more about this software. |
In this 2025 Topaz DeNoise AI review, you’ll find an in-depth analysis of and tutorial for this noise-reduction software from Topaz Labs.
Topaz DeNoise AI is a potent, AI-powered software that removes noise while keeping and enhancing the original detail in your photos. It has an easy, intuitive interface with different noise removal options depending on your image. However, making the most of DeNoise AI requires some knowledge, and the software is graphically demanding if you have a slow computer. Even though DeNoise AI is not perfect, it’s one of the best noise reduction software on the market.
I’ve been using this software for years and my experience using DeNoise AI to reduce noise couldn’t be better. In this Topaz DeNoise AI tutorial, I’m going to show you how the software works, step by step, and explain the pros and cons of using DeNoise AI on its latest version.
Ready to fight the noise in your images? Let’s get to it!
You can also see the Topaz DeNoise AI full review and tutorial in the video below!
What is Topaz Denoise AI?
Topaz DeNoise AI is a sophisticated piece of software created by Topaz Labs, a well-known company that implements cutting-edge technology based on artificial intelligence to fix post-processing issues like noise reduction and sharpening.
While traditional noise reduction software often reduces the original detail in your images, DeNoise AI’s noise reduction eliminates noise, preserving the detail but also enhancing it. Artificial intelligence plays a key role in today’s post-processing software and Topaz Labs was the first company to start developing this tool many years ago, so it’s well ahead of other programs and, without a doubt, the best noise reduction software on the market.
The new update of Topaz DeNoise AI offers different advanced DeNoise AI Models that can be integrated perfectly into your workflow; you can use it as a standalone piece of software or as a plugin for Photoshop or Lightroom.

How to use Topaz Denoise AI – Denoise AI Tutorial
DeNoise AI is intuitive and easy to work with. In this section, I’ll break down how to use Topaz DeNoise AI in a few simple steps.
DeNoise AI download & installation
-
- Download and install Topaz DeNoise AI. Go to Topaz Labs and select your operating system. Topaz DeNoise AI supports both Windows and Macintosh OS. Once you download the file, you can start the installation process. Be patient, as this process can take a bit longer than normal due to the automatic downloads needed to complete the installation.
-
- Once the installation is finished, you will be able to see the Topaz DeNoise AI standalone version among your applications. Topaz DeNoise AI plugins for Lightroom or Photoshop should have also been added automatically. If not, you can add them manually.
-
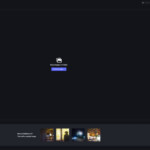
- The first time you open Topaz DeNoise AI, you will be asked to log in with your Topaz Labs account or to try the Denoise AI 30-day free trial.
Now we’ll dive into how to use DeNoise AI in its different versions.
How to remove noise with DeNoise AI
Before getting into details, this is, briefly, how to eliminate digital noise with Topaz DeNoise AI step by step:
-
- Open DeNoise AI
- Drag or open your image
- Select the best AI model
- Adjust the setting sliders or leave it in Auto mode
- Apply the adjustments locally, if necessary, using the mask tool
- Save the new file with the output settings selected
Note: Topaz Labs encourages you to use DeNoise AI at the very beginning of your post-processing workflow to achieve better results for reducing noise while preserving detail. I highly recommend following this advice so you start working on a clean image.
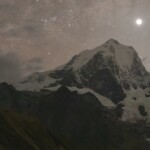
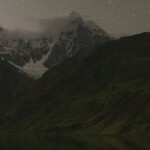
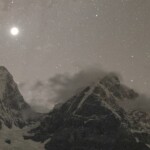
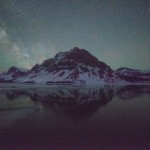
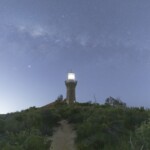
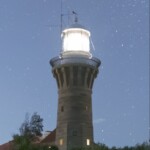
For this DeNoise AI review, I am using a test shot and the latest version of Topaz DeNoise AI. The image was taken in the Huayhuash mountain range in Peru. It was taken using a Sony a1, at 20mm, using the following settings: f/1.8, ISO 6400, 13s, resulting in a very noisy photo.

Sony A1 – 20mm at f/1.8, ISO 6400, 13s
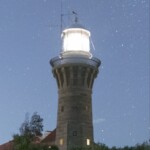
As you can see in this 100% zoom crop, it is very noisy.

100% crop
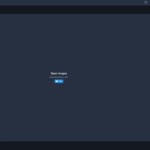
To begin this tutorial, this is the interface of Topaz DeNoise AI:

Topaz DeNoise AI interface
To start using the software, open or drag your file(s). DeNoise AI supports most of the commonly used photography files like raw files, dng, tiff, jpegs, etc.
In the upper right corner, you will find a toolbar with these options:
Preview options
To change the view mode of the photo you’re working with, you can select:
-
- Original (original photo preview)
- Single (denoised photo preview).
- Split (Original and denoised photo preview with a split slider)
- Side by Side ( Original and denoised photo preview)
- Comparison ( Compare how the different Ai Models work in your photos at the same time).
Zoom
Zoom in on your images to accurately check the process’s progress.

Top Toolbar view in DeNoise AI
On the right side, you’ll find:
-
- A navigator with the selected zoom box.
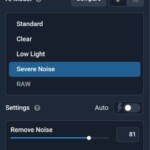
- A list with the following DeNoise AI Models:
-
-
- Standard: Broadly developed noise reduction that maintains detail.
- Clear: Best for photos with smooth and rounded surfaces such as skin, rocks, water, etc.
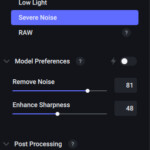
- Low light: Best for low-light conditions and heavy noise
- Severe noise: Best for extremely noisy photos
- Raw: The newest AI model in DeNoise. It provides excellent noise reduction, preserving detail, and authentic color starting from a RAW file.
This model applies a color profile prior to noise reduction and, on some occasions, it adds a lot of contrast and mismatches some colors. If that is the case in your photos, my recommendation is to use DeNoise AI after applying your desired color profile and lens correction in Photoshop or Lightroom.
-
-
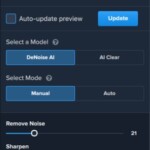
- Main Settings. The Auto mode works great in most situations. However, it can be pretty aggressive and give your photos a washed-out look. With Manual Mode, you can set the adjustments according to your taste.
- The Post-processing sliders help reduce any color noise remaining in your photos and preserve original detail.
- Save Image: To set your output settings before saving your images.

AI Models and settings panel in DeNoise AI
DENOISE AI workflow recommendation
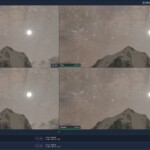
The easiest way to start using DeNoise AI is by using the suggested mode (Light bulb icon) which automatically selects an AI model based on your image. However, to eliminate digital noise with Topaz DeNoise AI and get the best results, I recommend using the updated comparison view, where you can quickly see and compare different AI models and even the same AI models with different settings.

Use the comparison view to check which AI Model/settings work best
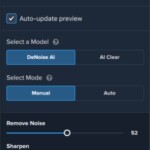
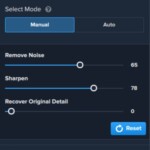
Once you have selected the best AI model either manually or automatically, then fine-tune the adjustment using the following settings:
-
- Remove Noise: This slider works wonders. It effectively removes the digital noise in your photo but doesn’t result in washed-out images. Values between 10-50 are enough in most cases.
-
- Enhance Sharpness: It sharpens and recovers the detail in images that may become a bit blurry after denoising. I don’t recommend setting values over 30 if you want to avoid halos or weird textures.
Topaz Labs has another piece of software dedicated to sharpening your photos called Sharpen AI. If you need to resharpen your image because it’s a bit out of focus or too soft, I recommend using that software after Denoise AI as I explain in this Sharpen AI review.
- Enhance Sharpness: It sharpens and recovers the detail in images that may become a bit blurry after denoising. I don’t recommend setting values over 30 if you want to avoid halos or weird textures.
Please also note that the Clear Mode has 3 (Low, Med, High) “Remove Noise” options and 2 (Low, High) “Enhance Sharpness” levels to choose from the settings above.
After that, refine your results with these DeNoise AI Post-processing adjustments:
-
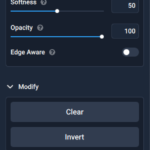
- Recover Original Detail: It helps recover some detail that has been washed out after the noise reduction and adds a bit of grain to keep the image natural. 20-40 points is usually more than enough.
-
- Color Noise Reduction: This is a very powerful tool to reduce any color noise remaining in your images. The new update includes a preview for this adjustment, so my recommendation is to zoom in on a dark area and adjust the slider until the color noise disappears.
-
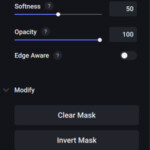
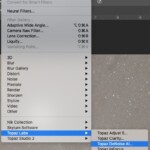
- Denoise AI Masking Tool: Topaz DeNoise AI also includes a super simple Mask tool in case you want to apply these adjustments locally in certain areas. Masking might sound daunting, but it’s really easy to understand; DeNoise AI will apply the selected adjustments only to the areas that you paint in red.
Quick Tip: If your photos are too dark it might be difficult to see how DeNoise AI is removing the noise but you can turn on the “Auto Brighten” (a brighter preview of your image) using the command ⌘+B or Ctrl+B keys.
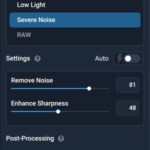
These were the settings I used for this particular scenario:

Denoise AI Model (Severe) and Settings
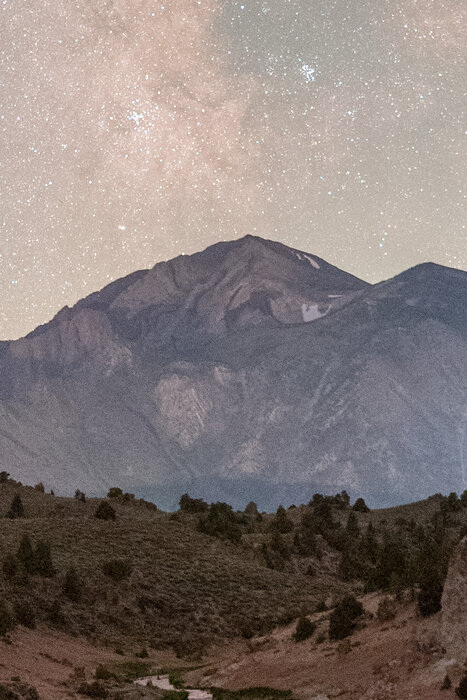
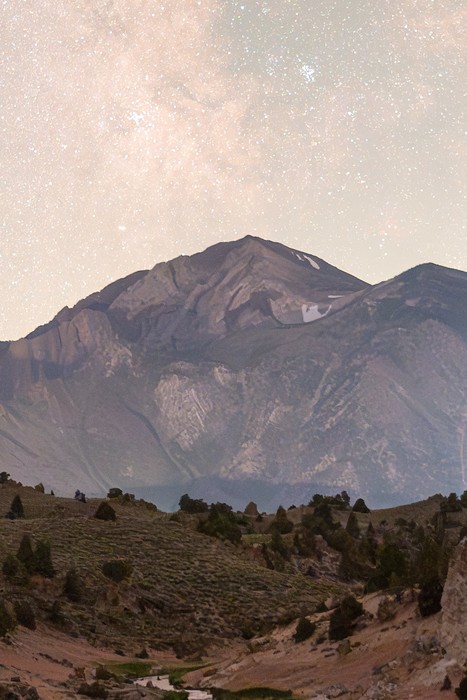
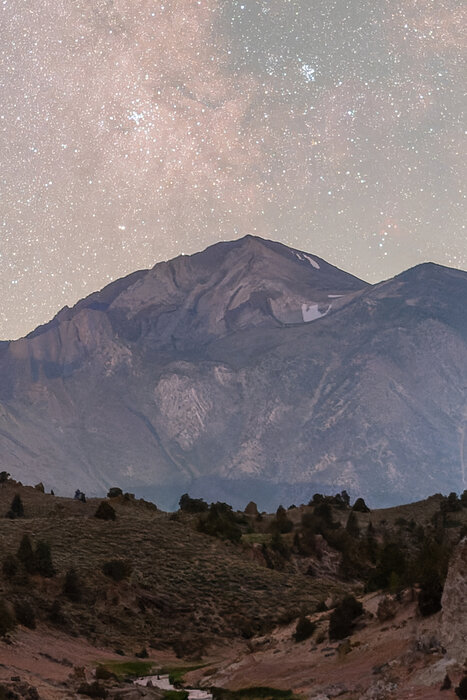
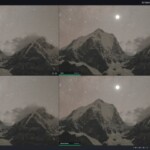
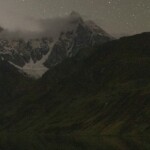
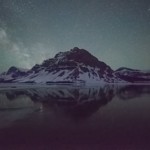
Now let’s see the results of DeNoise AI noise reduction in this before and after comparison:


DeNoise AI removal using Severe AI Model
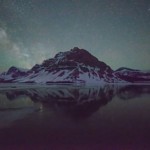
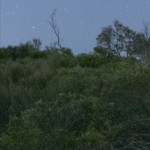
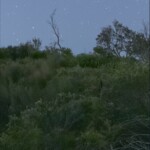
As you can see, DeNoise AI effectively reduces the noise in all the shadows, the clouds, and the sky while preserving the detail in the stars and even enhancing the sharpness in some areas of the mountain. You can see another example in a noisier area here:


The luminance and color noise are completely under control while the details are still there
Using Topaz Denoise AI plugin for Lightroom
Reducing noise in Lightroom with Topaz DeNoise AI couldn’t be easier. Even though you won’t be able to apply the adjustments locally as well as you can with the DeNoise plugin for Photoshop, launching the plugin from Lightroom makes the whole process faster.
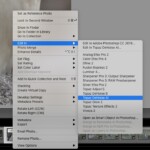
To use DeNoise AI in Lightroom follow these steps:
-
- Right-click on the image selected > Edit In > Topaz DeNoise AI. If asked, always edit a copy with the Lightroom Adjustments.
- Apply the adjustments accordingly as explained above.
- Click on Save and wait until the image is processed and imported into Lightroom.
You can reduce the noise in Lightroom with the LR built-in adjustments, but using the Denoise AI plugin will make a vast difference in your photos.

Using Topaz Denoise AI plugin for Photoshop
Using the Topaz DeNoise AI plugin for Photoshop is the best way to reduce noise in your images. It’s a process I’ve been using for years, and you can easily benefit from incorporating this method into your workflow.
The most remarkable advantage is being able to create different noise reduction layers depending on the areas of the image and applying the layer masks locally with more precision than the Denoise Masking tools.
To reduce the noise using Topaz DeNoise AI as a plugin in Photoshop, follow these simple steps:
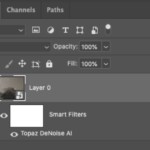
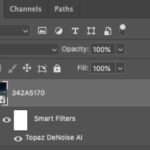
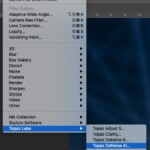
-
- Duplicate your layer or create a Smart Object layer so your adjustment is not destructive.
- Go to Filter > Topaz Labs > Topaz DeNoise AI
- Apply the adjustments as explained above
- Click on Save and wait until the image is processed and imported into Photoshop.
While the internal Photoshop noise reduction options are more varied than in Lightroom, DeNoise AI provides better results.

Topaz Denoise AI before & after review
So far, I’ve covered how this software works, but the question is: is Topaz DeNoise AI worth it? Let’s analyze the results in more detail using some Topaz DeNoise AI before and after examples.
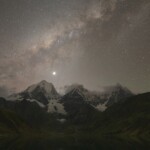
Topaz Denoise AI for astrophotography
Astrophotography always means dealing with digital noise, so having a reliable denoise piece of software is a must.
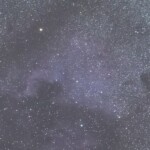
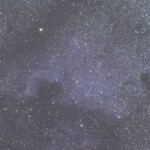
This is one of my favorite photography genres and, after applying DeNoise AI to countless Astro images, I can tell that the way this software reduces the noise in the sky without eliminating any stars is simply incredible. There is no question that Topaz Denoise AI is the best noise reduction software for astrophotographers:


DeNoise AI removal using the Low Light AI Model on a deep-sky astro image
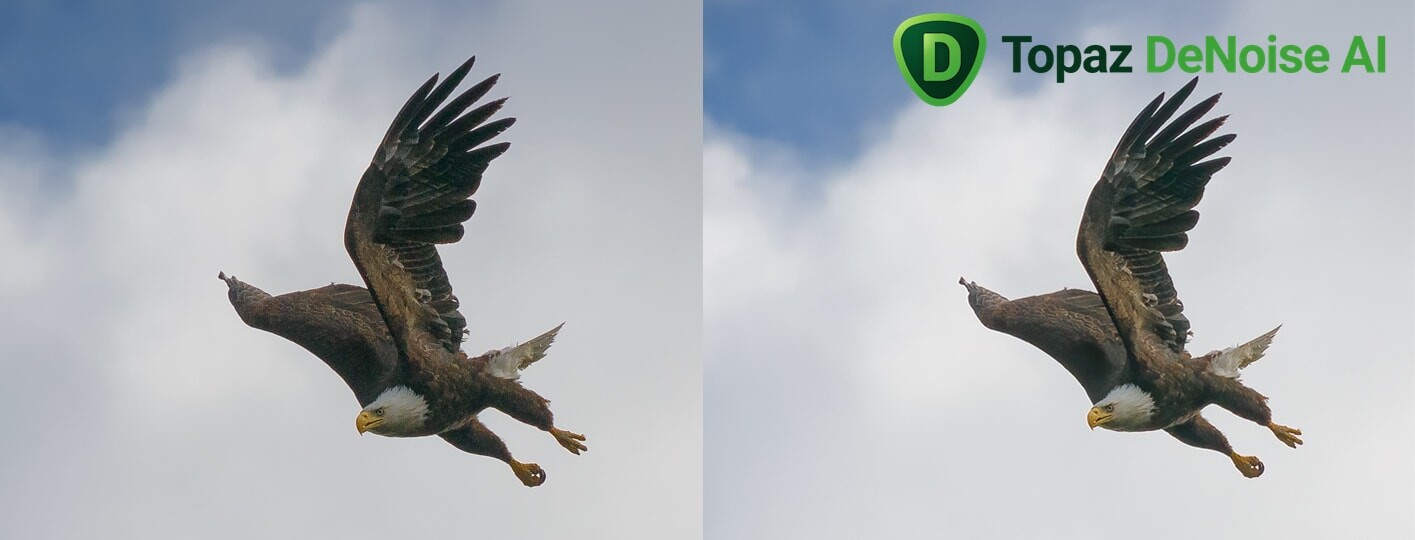
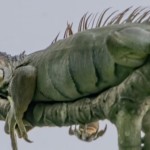
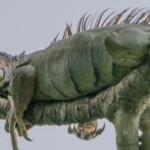
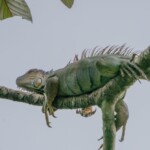
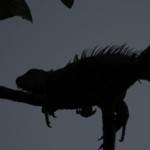
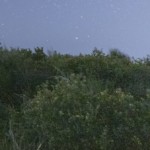
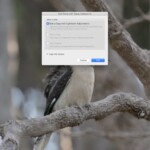
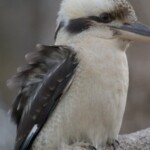
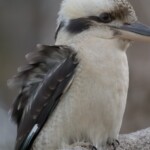
Topaz Denoise AI for wildlife
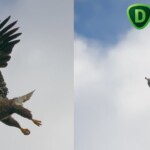
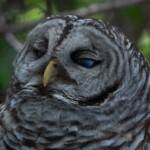
When shooting wildlife, there are many occasions where High ISO settings are required to maintain a fast shutter speed, which results in noisy images. Topaz DeNoise AI is able to fix this common problem, providing clean images with enhanced details:


DeNoise AI removal using AI Clear model on a wildlife shot
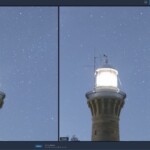
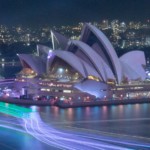
Topaz Denoise AI for architecture
Topaz DeNoise AI also performs really well with complicated structures and textures, easily removing any kind of noise while keeping even the smallest details sharp:


DeNoise AI removal using the Standard AI Model on an architectural photo.
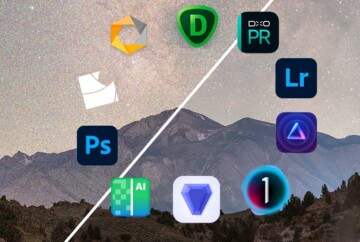
Comparisson between Denoise AI, DxO PureRaw and Lightroom Denoise AI
Topaz Denoise AI has been are the forefront of AI denoise tools for many years, and when it comes down to this, there is not other tool as complete as Topaz Denoise AI. However, over the years, there have been other competitors entering the market, and you might be wondering, how does Topaz’s software compare to some of the most popular AI noise reduction software in the market?
-
- Topaz Denoise AI: This is my go-to noise reduction software. It has outstanding noise reduction capabilities, as well as a complete set of tools to refine the results. I’ve been using it for years, and even if you are a beginner, you will be able to achieve great results. The main drawback is its price, but you can always download the free trial to test it before purchasing.
-
- DxO PureRaw: When it comes to just noise reduction, DxO PureRaw has the lead. Its AI models to reduce noise are the best in the market. I rely on PureRaw mainly for images with a severe amount of noise. It’s not my first choice because of its lack of tools to refine the adjustments.
-
- Lightroom Denoise AI: Lightroom recently added a new AI noise reduction feature which delivers beautiful results almost at the same level as its competitors. This new AI tool in Lightroom is a great choice for anyone who already owns a Lightroom Classic license and don’t want to pay extra for a third-party plugin; however, if you want the best results, I still recommend Topaz Denoise AI or DxO PureRaw.

Topaz Denoise AI discount and Price
Since early 2024, Topaz Denoise AI has been integrated with Topaz Photo AI. The price of Topaz Photo AI is $199 for a lifetime license, a fair price considering it’s among the best noise reduction software on the market.
| IMPORTANT NOTE: Topaz Denoise AI is now part of Topaz Photo AI and can no longer be purchased as standalone software. You can use this article to learn how to use Topaz Denoise AI if you already own it. Note that Topaz Labs is not going to release any new updates for this software. Read our Topaz Photo AI review article to learn more about this software. |
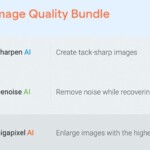
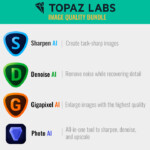
If you’re a passionate photographer, getting Topaz Photo AI is a great investment. It includes Denoise AI, Sharpen AI, and Gigapixel AI. This is the best software package with Artificial intelligence and will take your post-processing to the next level.

Topaz Labs runs several promotions throughout the year. You can check if there is an offer available here.
If you want to get more info about the other software included in the Topaz Bundle, you can also check my other Topaz Reviews:
Conclusion
| Topaz Denoise AI is capable of eliminating the noise while preserving detail in most situations. It’s a very simple and effective software with a user-friendly interface and possible connections as a plugin for Lightroom and Photoshop. However, Denoise AI is not perfect; it requires some experimenting with the different adjustments and a relatively powerful computer. |
My experience using Topaz DeNoise AI for many years has been fantastic. I usually shoot in low-light conditions and end up with noisy images, so Denoise AI is a key tool in my post-processing that I use almost on a daily basis, along with Sharpen AI.
Topaz DeNoise AI is the best denoising software at the moment, and, if you don’t believe me, just take a look at this noise reduction software comparison, where I tested the 9 most important denoise programs on the market.
I hope you found this Topaz DeNoise AI review helpful!


Any questions about this Topaz Denoise AI Review? Feel free to leave them in the comments!


Hi, and thanks for the great article.
Thanks so much Ray! 🙂
I mainly use Jpeg files for my sports photography, which would you suggest for denoise?
Matt, it’s very convenient using RAW files when reducing noise.
How can you get Blackmagic Braw files into topaz? Do you have to convert Braw to dng?
Morgan,
I’m sorry but I can’t help with this, never tried Blackmagic files with Topaz.
Denoise 3.7.0 released in June 2022, not June 2023 as mentioned at top if this review. Worth fixing this typo.
Nice review though!
Thanks, Nikolay! We’ll fix this 😉
I’m curious about the date of this review, to find out if it’s current. It says the latest release was in June 2023, which clearly is not true because it’s only March 2023 right now.
Hi Sean, we just updated the review. Hope it helps. 🙂
Thanks so much for the review. I’ve enjoyed this tool for awhile now. Just updated and immediately had issues in Lightroom not being able to read the file when I told it to “edit original”. I see where you said to always use “edit a copy” but then you have double the images in Lightroom and have to sort through them. How do you manage this? Why did it stop working for “edit the original” why do you pick “edit a copy”? Thanks so much!
Linz,
The issues with the Topaz update should be fixed by now 😉
High Dan!
thanks for your review of DeNoise AI! I am just new to photography in general and specifically to PP. I own an XT-3 Fujifilm, shoot RAW+JPEG, and when needed post process RAW files in Capture 1 Express. In the review you mention that it is best to use DeNoise as first step in the PP flow. But you also warn that by doing that contrast and color might be altered. Would you advise me on the best sequence to follow between DeNoise and Capture1? And the file format to be exchanged by the two softwares?
Thanks a lot
Achille
Achille,
The workflow is the same as for Lightroom; do your RAW adjustments in Capture One, and then apply Denoise AI in Photoshop. I always work with PSD files but you can also work with high-quality TIFFs.
Hope this helps!
Dan
I’ve installed denoise ai and the results are really very good indeed.
But I still can’t find the masking toolk. Help would be appreciated.
Bernd
Bernd,
I recommend watching this DeNoise AI Tutorial Video where I show how to use the masking tool.
Best,
Dan
After reading a number of reviews I downloaded the software at this morning (01:00 hrs or thereabouts). I have tried it out on various high ISO high noise images. I can honestly say I am blown away by the results. The details are enhanced and the noise, well it’s just gone. Amazing piece of software. I have 29 more days to put it through it’s paces but to be honest I’m sold on it already.
Hi David,
Your comment reminds me of the first time I gave a try to Topaz Denoise AI, I was also amazed by the incredible results. Not only in noise reduction but in keeping details in the image is by far the best noise reduction software.
Enjoy it! 😉
Dan
Very good review, explanations, and before and after examples. If I can, I would like to share an experience I was having with the software after recently purchasing it. I was finding that in Photoshop the preview display of before and after looked amazing. But when I saved the changed and it returned to Photoshop the results were not that great. I tried doing some pictures using the software as a stand alone and got similar results. I reached out to Topaz. I got back this response which seemed to do the trick. “One thing I would suggest is going into File > Preferences > Advanced Preferences and switching “Enable Discrete GPU” to Off (If it’s On) and enabling OpenVINO. If it’s already Off, switch Enable Discrete GPU to On instead” Not sure why this worked but it did but it did slow down the processing. But, the end results are what matter
Hi Bob,
Thank you very much for your message and for sharing this valuable tip with us.
I never experienced that (or at least I didn’t notice that difference), but guess that it also depends on your GPU or your initial settings.
In any case, as you said, what matters is to make it work and achieve the effect on the image, so I’m glad that you could work this out with the guys from Topaz.
Another side note is that they’re truly helpful, I had some questions related to the software and they always replied very quickly and did their best to help me, so the great customer service behind this software is another thing we missed to remark in the article!
Best,
Dan