SUMMER SALE - USE CODE: "SUMMER50"
50% OFF YOUR COURSE
CAPTURE THE MILKY WAY & BENRO POLARIS COURSE
You missed out!
75+ VIDEO LESSONS | 27+ HOURS OF CONTENT

Photographing Northern Lights with a GoPro is totally possible.
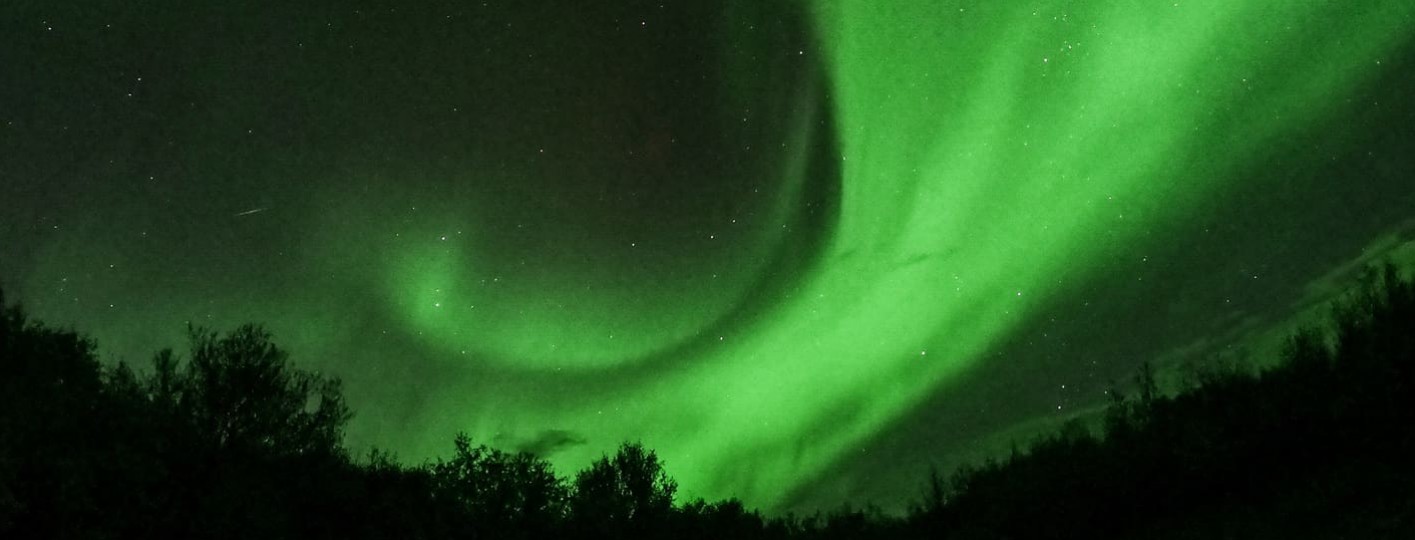
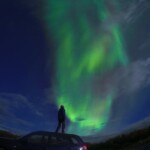
I always thought it was impossible to photograph Northern Lights with a GoPro, but during my last trip to Iceland, I was impressed with the results my friend Luis got by shooting the Aurora with a GoPro 7.

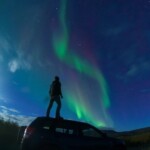
Northern Lights shot with a GoPro 7
The quality is even better within the Go Pro 9, but don’t worry if you have any of the previous GoPro models; I’ve seen beautiful images captured with older models like the GoPro 4.
In this guide, I’ll show you how to take pictures of Northern Lights with a GoPro step by step. But before diving into all the steps, if you’re in a hurry to set up your GoPro to capture the Aurora Borealis, I’ll summarize the key points for you.
Best GoPro camera settings for Northern Lights
Here are the best GoPro camera settings for Northern Lights in a nutshell:
- Mode = Nightlapse
- Interval = Continuous if you want to avoid any shakines
- Megapixels = 12 MP Wide (maximum available)
- ISO = 800 Max
- Shutter speed = 30 sec
- Protune = ON
- Spot meter = OFF
- White balance = Around 3200 K
- Sharpness = High
- EV Comp = Off

Best setting for photographing Northern Lights with GoPro
Best Steps to photograph Northern Lights with a GoPro
1. Put YOUR GOPRO IN A stable place
Shooting the Aurora with a GoPro requires long exposures, so the most important thing, if you’re aiming to capture a sharp Aurora image, is to make sure your GoPro is static and stable.
For this, I strongly suggest using a tripod for Gopro. That way you’ll be able to set your camera quickly.

Making your camera stable is the first and most important step
If you plan to see the Northern Lights in Iceland or decide to go Aurora chasing in Alaska, these are usually windy places, and wind is stabilization’s worst enemy, especially for light cameras like GoPros.
For this reason, try to set your GoPro on a tripod and adjust it as low to the ground as possible to avoid its being shaken by the wind.
2. Turn off the Wi-fi and the LCD Screen
After a couple of hours photographing Northern Lights with a GoPro, you’ll see how quickly the battery life decreases, especially if you shoot Northern Lights in Canada, Alaska, and other cold places.
To save as much battery as possible, turn off the Wi-Fi and the LCD screen.
3. Turn on the Protune to adjust the best GoPro settings for the northern lights
Once you turn on the Protune, you’ll have access to the best settings for taking Northern Lights shots with the GoPro, like ISO, white balance, Sharpness, etc.

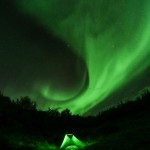
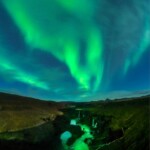
GoPro Northern Lights at Godafoss, Iceland
4. Choose the best Color mode
If you don’t edit your GoPro photos, you can use the default GoPro color mode.
On the other hand, if you want to make the most of your GoPro for shooting the Aurora, I suggest using the Protune Flat mode and editing your picture later with any software.
Your image will look flatter on camera, but you’ll capture more detail in the highlights and shadows, plus you’ll have more room for editing your image and get a final better result.
5. ADJUST YOUR WHITE BALANCE
This is a personal choice, but I find the best White balance for Northern Lights on your GoPro to be around 3200 Kelvin.
In any case, you can always tweak your white balance when you edit your Northern Lights GoPro images.

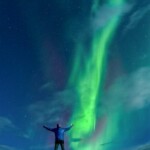
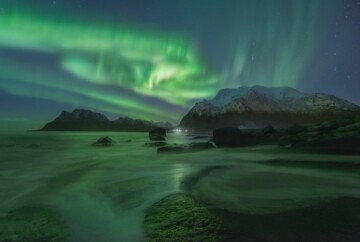
Aurora over Sigoldugljufur canyon shot with a GoPro 7
6. Enable Night Lapse
If you enable the Night Lapse mode when you shoot the Aurora with your GoPro, the camera will keep shooting once you press the shutter button.
You want to do this, first of all, so you can avoid any vibration when you press the shutter and, second, so you can choose which Aurora you like the most out of all the images you capture,
You can also create a Northern Lights time-lapse with your GoPro if you take enough images.
7. Set a continuous interval
With a continuous interval, your GoPro will keep shooting Aurora images one after another, with no need to press the shutter button.
Use this to avoid any shakiness.

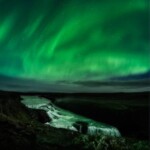
Strong Northern Lights display in Iceland
8. Adjust the Shutter speed
The shutter speed is the most important setting for capturing Northern Lights with a GoPro.
The longer time you set, the more light you’ll capture, but also, the Aurora will look blurrier.
The key is to find a balance while considering the light of the scene (this will depend on the moon phase, external lights, strength of the Aurora, etc).
I’d suggest starting with a 10-20” exposure and adjusting accordingly. The goal is to have a correctly exposed and sharp Aurora image.
Tip: Before starting your Night Lapse, I’d recommend trying different shutter speeds in the normal night photo mode. Once you find the perfect exposure, set the Night Lapse mode again and start shooting.
9. Set the right ISO
Shooting at night, you’ll be forced to raise the ISO to get the correct exposure.
However, there’s always a caveat when you raise the ISO: noise in your photos.
Try not to raise your ISO over 800, and, if you find noise in your images, use the best noise reduction software in the market.

Don’t raise the ISO above 800 when shooting the Aurora with a GoPro
10. Check your Gopro Aurora images and adjust
All these years photographing Northern Lights have taught me a very important thing: the Northern Lights are unpredictable.
You may have the best Aurora settings on your GoPro, but all of sudden, the Aurora activity increases and the parameters to shoot change completely.
Additionally, the Aurora usually “dances” across the sky, so you need to be ready to change your composition and settings all the time.
Other Northern Lights Gopro settings
Besides the GoPro Aurora settings explained above, don’t forget to adjust:
- Spot meter: Off
- Sharpness: High
- EV Comp: Off
- Megapixels: 12 MP Wide (maximum available)

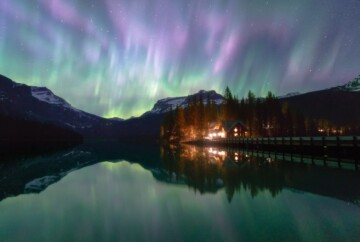
Northern Lights and full moon in Iceland
GoPro adjustments for filming Northern Lights
Last but not least, here are the settings if you plan to film the Northern Lights with a Gopro:
- Color: Same as for photographing. Use flat or color mode depending on the subsequent edit.
- White balance: Set it manually according to your preference. 3200 K is a good starting point.
- Frame rate: Disregarding the resolution, choose the lowest frame rate. 1080/24 is a good setting for filming the Northern Lights on your Go Pro.
- Shutter speed: You need to try different speeds since this setting will depend on the light conditions. You can leave it on auto or start with 1/24.
- ISO: Try not to increase the ISO above 800 to reduce the digital noise in your images.
Can you photograph the northern lights with a GoPro?
AAs you can see, photographing Northern Lights with a GoPro is feasible regardless of your GoPro camera model and your skills. You may not obtain images of the same quality as you would get by using one of the best cameras and lenses to photograph Northern Lights on the market, but the GoPro is certainly the best option for travelers who don’t want to carry a heavy camera.

Northern Lights “Crown” captured with a GoPro
However, make sure you follow all the steps described above and be patient; the Northern Lights are unpredictable and difficult to capture!


So glad I came across this article! I used GP last night to get a time lapse and with battling fog it came out darker. Tonight is another chance and hoping to get better footage this time!!
Thanks so much, Heather 😊 I’m so glad you found it useful! Happy shooting!
Which SD card should I get and how much memory needed to capture the Aurora?
Thank you
Flynn,
I recommend a fast SD card. I use the Samsung EVO 120 GB Class III.
Thanks for sharing hopefully i did a good job to capture the northern lights.
So happy it helped, Rico. 🙂
Thanks for this tutorial ! When did you take this awesome pictures and in which areas ? 😀
Thanks Gabriel!
They are all taken in Iceland (Golden Circle) in September.
Would you recommend the max lens mod for added stability and a wider frame? I have the 10 Black and I am going to Iceland in mid-January for the Northern Lights.
Hi Emily, I don’t recommend you the max lens mod since you’ll need to use a tripod anyway to shoot the northern lights. However, a wider frame is recommended. Hope you enjoyed in Iceland!
Thank you for these tips, very much. One not always travels to shoot aurora lights, so being confident about setting is an important point of whole trip 🙂
I’m about an Island trip in few days and just making sure not to waste the time 😉 Of course, what will be seen will not be unseen, but I’d like to keep something to share with my family 🙂
So, thanks ones again 🙂
Thanks so much Andrzej!! Glad it helped 🙂
Thanks for sharing this awesome article.
Thanks for your words Alfredo! And good luck capturing the Northern Lights with your Go Pro! 😉
Best,
Dan