Home | Photography | Photography Gear | How to Choose the Best Travel Photography Gear
.
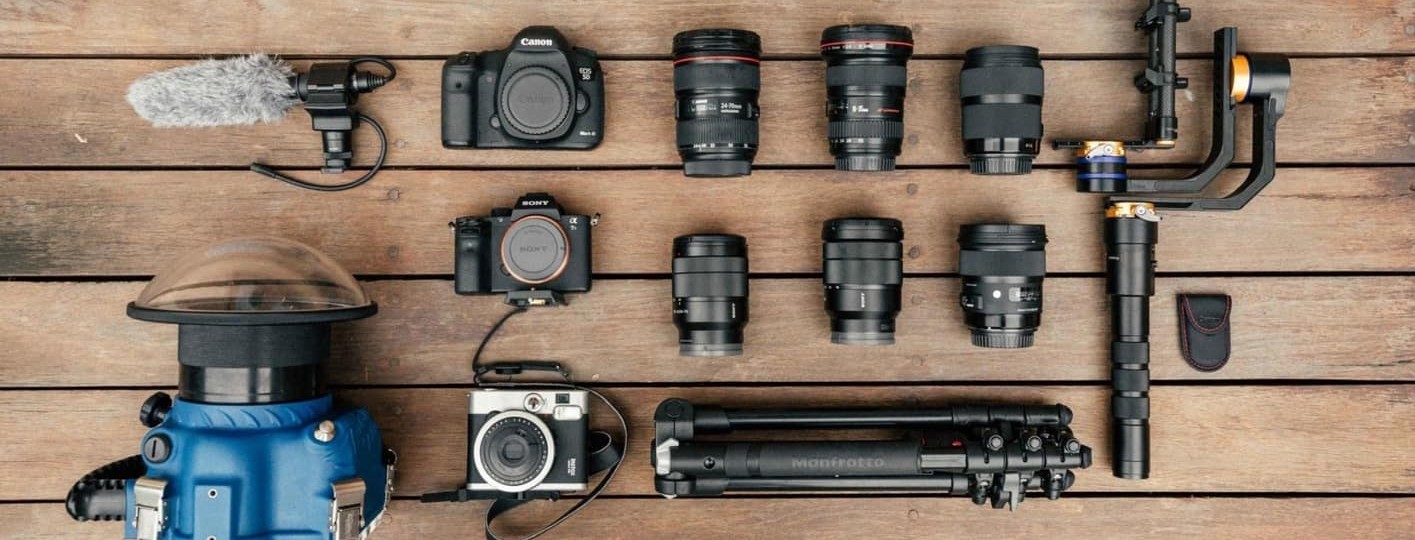
Choosing the best travel photography gear is a complex task that more and more amateur travelers try to figure out these days. And we are not just talking about getting ready for a photo tour. More and more backpackers and travelers invest their savings in photography equipment for capturing unforgettable moments while on their globetrotting journeys.
The best travel photography equipment will depend on the type of photographs we want to take and the message we want to share. Our choice would be different if we want to photograph cities and architecture or if we usually capture landscapes and nature, or even portraits of local people and wildlife.
In addition to the price and technical difficulties, weight and volume are other very important factors when choosing the photography equipment that we will use during our trips.
The possibilities in the travel photography world are very broad. In this article, we want to help you save time, money, and prevent unnecessary purchases by recommending the essential travel photography equipment to capture each one of your adventures around the world.
ESSENTIAL GEAR IN YOUR TRAVEL PHOTOGRAPHY Equipment
Across this navigation panel you can move quickly through this guide to choose the best travel photography equipment:
- Camera: We compare different types of camera bodies to show you what technology best suits your needs.
- Lenses: We explain the different parameters that you should know when buying a camera lens.
- Tripod: All the factors that you must take into account to find the perfect travel tripod.
- Accessories: Filters, backpack, remote shutter, headlamp, batteries, memories, L-plate, leveling base, grip and cleaning accessories. Everything you need to complete your travel photography equipment.
The best CAMERA for travel
The latest generation of cameras are smart phones, compact cameras or action cameras like GoPro. Any of them can be used to take pictures during our trips. However, to take the highest quality shots, there is still a big difference compared to cameras with interchangeable lenses. Therefore, we will focus on this type of cameras in this post.
DSLR VS MIRRORLESS CAMERAS
There are two types of cameras with interchangeable lenses: DSLR cameras and Mirrorless cameras.
DSLR CAMERAS
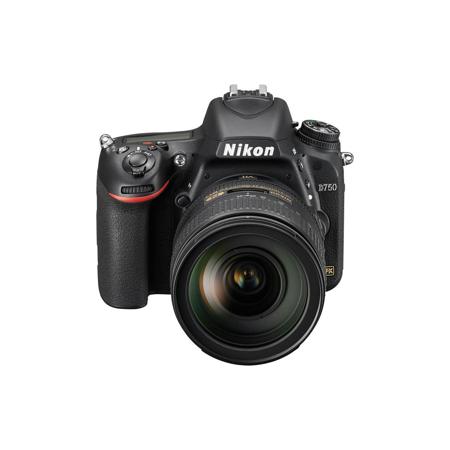
DSLR cameras have been used for decades. This technology is fully developed and tested. Today, we can find a very wide range at affordable prices for beginners as well as a large second-hand market. Its main counter is weight and size, which often ends with many travelers leaving them at home or the hotel.
The main popular manufacturers of DSLR cameras are Nikon and Canon, although there are other manufacturers to consider such as Pentax, Leica or Samsung.
MIRRORLESS CAMERAS
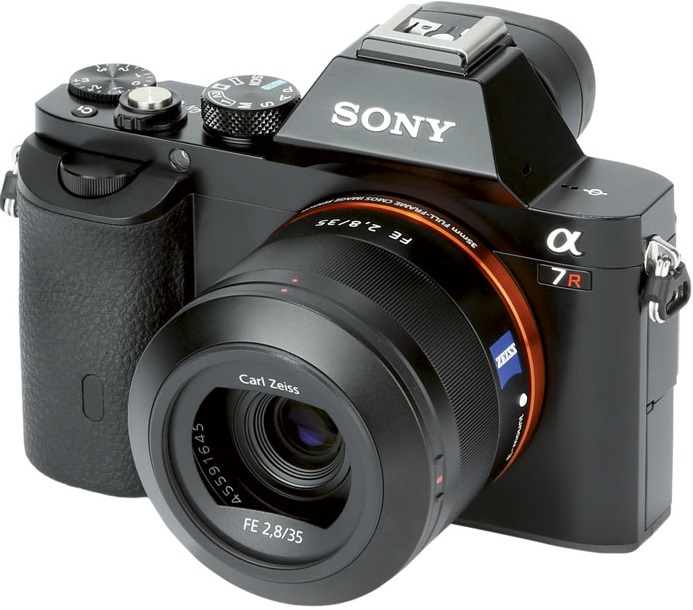
Mirrorless cameras are the second option. Their technology has been developing fast over the last years, and the image quality from the last generations is quite similar compared to a DSLR. These cameras are usually more expensive and their second-hand market is quite scarce at the moment. The main advantage is the lightness of the camera body, and so they have gained popularity in recent years as travel cameras.
Regarding mirrorless cameras, the leading brands that are developing this system in recent years are Sony, Olympus, and Fujifilm.
You can learn more about DSLR vs Mirrorless in our guide.
CROP VS FULL FRAME
Another important factor to consider is the sensor format since its size determines the resolution, luminosity and focusing speed.
crop SENSOR (APS-C)
We can find the crop sensor in most amateur and semi-professional cameras, although there are exceptions. For generic and amateur use, this sensor should be fine to take our travel shots.
FULL FRAME
Compared to a cropped sensor, a full frame camera sensor capture more light, and therefore produce a greater image quality and sharpness provided that all other factors are the same (i.e., same lens and photographic conditions). It is usually included in most professional cameras.
For trips where you want to photograph night or low light scenes (for example, for Northern Lights photography it is recommended to use one of these full-frame cameras for Northern Lights) or where you need a high focusing speed (for example for whale watching from Vancouver), it is highly recommended to have a full frame camera if you want to reduce digital noise.
You can check other differences between sensor sizes on our guide to this topic.
OUR SELECTION OF CAMERAS FOR TRAVEL PHOTOGRAPHY
The following camera models are the ones we usually recommend depending on the photographer’s skills and knowledge. We suggest two beginner models, two advanced models and two professional models in this list.
DSLR CAMERAS
mirrorless CAMERAS
Keep in mind that using a professional camera doesn’t necessarily mean your photographs are going to be better, even if you have a better sensor and more megapixels. The use of these cameras is much more complex and making the most of this type of photography equipment for traveling requires time and perseverance.
In addition, the more advanced the camera is, the higher will be the price – not only the body but also the rest of your photography equipment since lenses and accessories tend to be more expensive.
LENSES FOR OUR travel PHOTOGRAPHY GEAR
Once we have the body, now we need the “eyes” that will make our camera see in one way or another.
FOCAL length
The focal length is the distance in mm that exists between the lens and the sensor of our camera. This will determine the vision and the proportions of the elements we photograph. We will need longer focal lengths if we intend to photograph elements that are far away from our camera and smaller focal lengths for capturing wider images.
It is normal to have different lenses that cover a wide range while traveling. For this, we can use variable focal lenses (zoom) or fixed focal lenses.
The fixed focal length lenses are determined by a specific number in millimeters (mm) which is fixed. If we want to change the perspective or zoom in and out, we will have to move closer or further away from the element. Thanks to these lenses, we can shoot the highest quality possible at a determined focal length and are much lighter than the zoom focal lenses.
The zoom/variable focal length lenses. Using these lenses we can change the focal length within a certain range. They have great versatility since we can change the focal length with a simple zoom wheel without having to change the lens or move. Although they are more expensive than the fixed focal lengths alternative, we can save a lot of money by not having to buy different lenses for each focal length. However, these lenses are usually heavier and often result in lower quality photos compared to those taken with fixed focal length lenses.
One of the most classic zoom lens for traveling is the so-called all-in-one zoom lens, which covers a very wide focal range. These lenses can be used to take many types of images, from wide landscapes to portraits or photos with distant details. Although they are very versatile, they are quite heavy and offer a lower quality compared to other fixed/zoom lenses.
Fisheye lenses
Fisheye lenses are ultra-wide lenses with a field of vision covering up to 180 degrees at a focal length of 7-15mm. They offer the widest focal length. You can capture practically the whole scene that’s in front of you with these lenses. They are ideal for time-lapse or creating original compositions.
WIDE ANGLE lenses
Wide-angle lenses have a focal length from 10 mm to 24 mm. With these focal lengths, we can capture a large area of the scene, making it the perfect lens for landscapes and creative shots close to the foreground. Also ideal for architecture, although we will have to be careful with the geometric deformations.
Medium focal lenses
These lenses have focal lengths ranging from 24mm to 70mm. In this range, we will find the classic focal points more similar to our e, such as a focal length of around 35 mm, which is perfect for street photography. We can obtain even more detail with longer focal lengths at about 50 mm, making it an excellent lens for portraits.
telephoto lenses
There are lenses with longer focal lengths, also known as “telephoto lenses,” with a focal length of more than 70 mm. We will find long focal lengths used mainly to take pictures of far elements with lots of details such as wildlife and sports, although some could also be used for portraits or landscapes.
LUMINOSITY (F)
Another factor to take into account when buying a new lens will be the luminosity, measured by the symbol “f.“ Average quality lenses start between f 4-5.6 while more luminous lenses can range from f 2.8, f 1.8, or even f 1.4.
The lower the f value, the “brighter” the lens (more light will hit the sensor), and the higher will be the price. But, we will capture greater clarity, especially when shooting under low light conditions (For example for Milky Way Photography, you will need a very bright lens, like one of these lenses for Milky Way Photography).
image STABILIZATION
For long focal zooms, lens with image stabilization can be of great help, especially if we do not use a tripod. This way, we can take sharp images even when we photograph elements that are far away or under low light.
OUR SELECTION OF lenseS FOR TRAVEL PHOTOGRAPHY
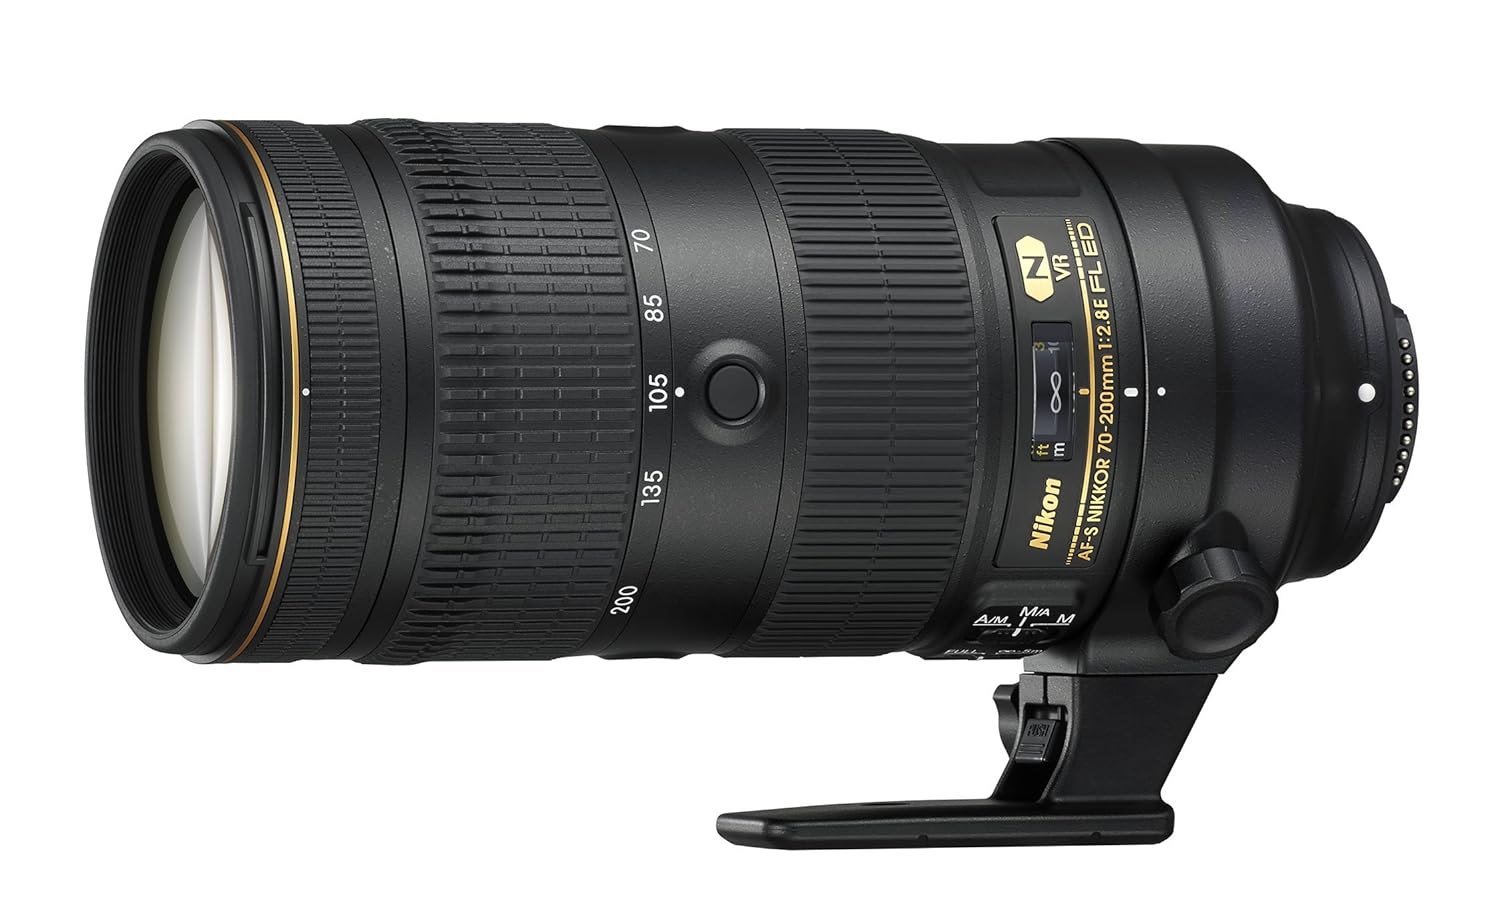
As lenses are so different between brands and models, we cannot make a general recommendation. However, we do not want to end this section without giving you some examples of different lenses when choosing the best travel photography equipment.
In this section, you can find different lenses for the Nikon D750. The following are the 3 lenses that we usually carry on our trips.
TRIPOD
We need stability for many types of travel photography, especially landscape photography and night photography. Therefore, it is essential to have a tripod and a ball head.
Choosing a tripod is not an easy task. Finding a balance between weight, size, stability, and the price is an arduous task and one of the most difficult decisions when choosing the best possible travel photography equipment.
SIZE
GORILLAPODS
They are small, ultralight tripods designed for trips that don’t involve serious photography adventures or long trips where weight is a key factor. We will need to use the elements at the location to place this tripod such as trees, streetlights or handrails.
TRIPODS FOR ORDINARY REFLEX CAMERAS
Tripods designed for day-to-day photography. They must be sturdy and stable but at the same time not extremely heavy or uncomfortable to handle, variables undoubtedly difficult to meet. We can find quite competitive prices and can be very useful even for road trips where size or weight is not a determining factor.
travel TRIPODS
These tripods are lighter and more compact than the ordinary tripods. There are many types of different materials, including hybrids between travel tripods and standard tripods. To be considered as a travel tripod, it must be packable into a handbag (less than 20 inches long) and weigh less than 4’4 pounds.
MATERIALS
ALUMINUM
Heavier than other materials but much cheaper at the same time. We found a wide range of aluminum tripods such as Benro, Manfrotto, Sirui, Vanguard, etc.
CARBON FIBER
Lighter but more expensive compared to aluminum. Many brands manufacture both aluminum and carbon fiber tripods, such as Manfrotto or Sirui, while others like Gitzo only produce carbon tripods.
PLASTIC
Many basic tripods, especially those that are given with the Starter Kit, have flimsy plastic components. We do not recommend this type of tripod as we find cameras and lenses too valuable to risk their lives in a plastic tripod.
SECTIONS IN THE LEGS
The number of leg sections will also be a factor to consider. They usually have between 3 and 5 sections. The more sections the legs have, the more the tripod can be folded, but in turn, more sections also mean thinner legs and less stability.
lock tripod legs system
An important point that many people overlook is the mechanism for folding / unfolding the legs. Currently, we can find flip or twist lock tripod legs systems on the market. Flip systems are supposed to be more durable, although the unfolding system is slower. Tripods with twist lock systems facilitate and make quicker the adjustment of the legs.
My experience is that once you try a twist lock tripod, you may not want to use the flip system anymore.
BALL head
Finally, the last element almost as important as the tripod is the ball head, as it will also hold the weight and ease the movement of the camera. The most common are the pan head and ball head.
Ball heads are most commonly used; with different adjustments to regulate friction and restraint. Some ball heads also include a level.
The pan head has several adjustable levers that help adjust the camera with greater precision. They are heavier and more voluminous than ball heads.
TRIPOD WE RECOMMEND FOR TRAVEL PHOTOGRAPHY
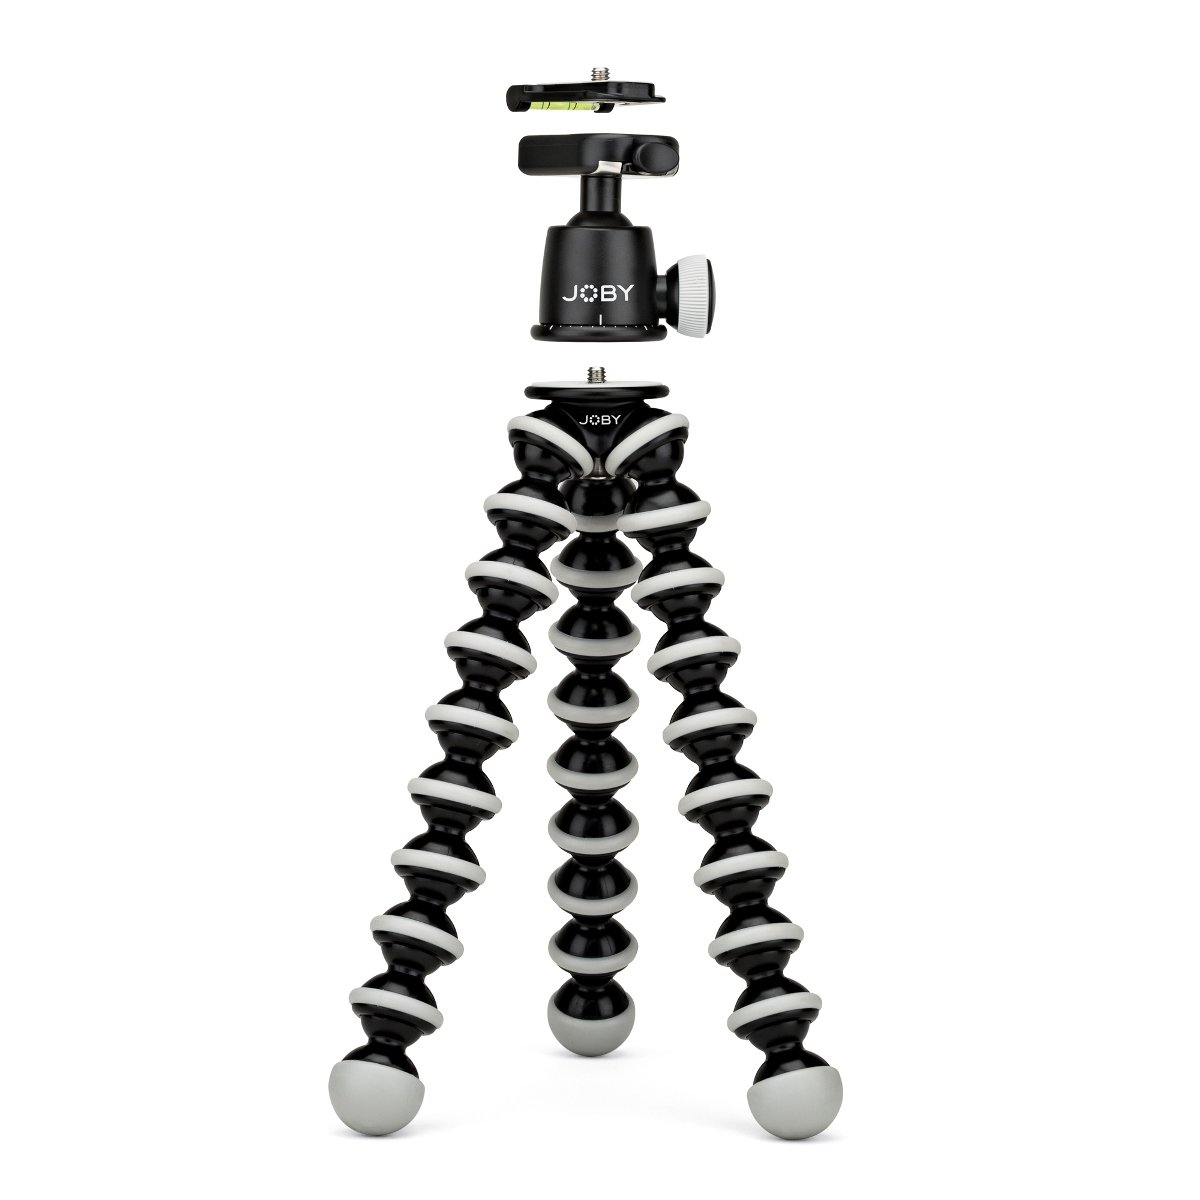
We have tested four different tripods in the last two years since we struggled to find a balance between weight, stability, and reliability. Finally, we found one that met all the requirements we looked for in a travel tripod.
This is the tripod and the ball head that we usually recommend for your travel photography equipment. Also, it is included a Gorilla pod that could be useful for certain occasions.
ACCESSORIES FOR THE TRAVEL PHOTOGRAPHY equipment
With the elements listed so far, we have put together a functional travel photography equipment set. However, depending on the type of photography, we may also have to include other accessories.
FILTERS
Essential for some landscape photography, especially when we want to do long exposure photography. The main filters we can find in the market are:
UV PROTECTING FILTERS
They are transparent protective glasses since they do not add or remove any element of light. We are not very fond of them as we see it unnecessary to make an investment in a good lens, and then cover it with another piece of glass that reduces sharpness or might add dust spots to your photographs.
NEUTRAL DENSITY FILTERS
Our favorites. They reduce the amount of light passing through the camera lens without changing the color or sharpness of the scene. It is usually needed to take longer exposures when daytime light is harsh or when our aim is shooting minimalistic compositions when there is water or clouds in the scene. There are several types depending on the amount of light they reduce. The main ones subtract 3, 6 or 10 light stops.
Graduated Neutral Density filters
They will help to gradually reduce the light, ideal for scenes where there is a high dynamic range with strong lights and shadows.
After testing different types of filters, we now only use Lucroit as we found them to offer the best quality on the market. In addition, we collaborate with them, and our readers can benefit from a 10% discount from this link.
Don’t miss our guide to lens filters for photography
PHOTOGRAPHy BACKPACK
The most convenient way to transport our equipment is a photography backpack, for both short and long trips.
It is essential to consider the purpose of a trip before picking a backpack since we could be carrying our equipment for hours if we plan to hike.
As a minimum requirement, a camera backpack should meet the following requirements:
- Have enough space to store all the photography equipment that we have discussed so far, with space for some clothes and food if we are going to do some trekking.
- Be made of resistant materials in case of hits and falls.
- Be Impermeable or have a waterproof cover to prevent water damage.
- The main compartment should be opened from the back to avoid theft.
- Have sternum and waist fastening straps to distribute weight on the hip and protect our back.
We found many options in the market, and recommend these two models based on the activity levels of your trip:
REMOTE Shutter
For landscape photography, a remote shutter is essential in addition to a sturdy tripod to achieve the greatest sharpness. This let us to operate our camera without pressing any button, thus shooting with no trepidation.
ILLUMINATION
FLASHES
An external flash is a convenient accesory if you enjoy taking portraits. It can also be used to illuminate scenes in night photography. Youngnuo and Neweer are brands with quality and affordable external flashes. Consider the space and weight before including them in your trips.
HEADLAMP
We need our hands free to handle our photography equipment with comfort for night photography, and a headlamp comes in handy for this. There are many types of headlamps offering different features and quality depending on the budget we have.
Minimaglite flashlight
If we want a lightweight flashlight that provides quality lighting, it is very convenient to carry this type of flashlight.
BATTERIES
Having several batteries in our photography equipment is essential for traveling, especially on trips where we may not have easy access to electricity or trips where low temperatures reduce the life of our batteries. If we also want to take long night exposures or time-lapses, it will be important to have more spare batteries.
We always carry a minimum of 3 and more depending on the type of trip. For example, on our Lofoten Lofoten Photo Tour, long exposures and subzero temperatures at night quickly ended the batteries lives.
If you are going to take a road trip with multi-day hiking on the itinerary, we also recommend taking a USB charger so you can charge using the cigarette lighter or a battery power bank.
MEMORY
As with batteries, we will need memory cards for taking and storing photos depending on the duration of our trip.
We recommend taking several cards with less space than one or two cards with a lot of memory in order to prevent problems in the case of loss or damage.
The main types of memory cards include:
- SD Cards: Common cards that we can use in all reflex and compact cameras.
- Compact Flash Cards: Cards that we can use mainly in most advanced and professional cameras. They have higher writing and reading speed and are more resistant.
L PLATE
For panoramic photographs, an L plate holds our camera on to the tripod horizontally and vertically, providing a fixed point for shooting with precision.
LEVELING BASE
In addition to the L-plate, a leveling base is useful for making micro-adjustments to stabilize the camera without using the tripod legs.
GRIP
This accessory helps us handle the camera more easily when shooting vertically, and at the same time it adds more battery power to our camera body. It is used mainly in portrait photography and long exposure photos (such as star trails) that consume a high percentage of battery.
Due to its weight and size, we do not recommend taking it for travel unless we have to do long portrait or time-lapse sessions.
CLEANING ACCESORIES
To shoot the sharpest and cleanest photos, it is important to keep our equipment in the best conditions; our gear needs to be cleaned both before and during the trip.
We don’t need to carry many cleaning accessories in our backpack, although it is recommended to take at least:
- Microfiber cleaning cloth: To clean both lenses and filters. If we are going to shoot waterfalls or sea photographs, it will be convenient to have several on your hands.
- Air pear and cleaning brush: To prevent any scratch on our lens, blow on the surface with an air pear and then remove all dirt with a brush before using the microfiber cloth.
- Cleansing wipes: Our favorite cleaner, to quickly clean any lens or filter.
Many of these products can be purchased together in packs at affordable prices.
SAVE money WITH YOUR TRAVEL PHOTOGRAPHY equipment
These are all the necessary elements for a complete travel photography equipment. However, don’t get frustrated if you cannot afford some elements or be obsessed with having the gear of your dreams from the start.
Apart from taking many second-hand items, we regularly use photography equipment rental services which in the end save a lot of money.
There are two cases where I recommend renting photography equipment.
First case, rent before buying an expensive new item such as a camera body or a lens. Renting allows you to test the equipment and help decide if it is really necessary so you don’t spend a large sum of money on something that you won’t really use.
The other case where I always recommend renting is when going on a trip where special shots are required only on occasion. For example, it is unnecessary to buy a powerful telephoto lens for a Safari if it is unlikely to be used again. Instead, you can use that money for renting the best telephoto lens available in the market and still save a significant sum of money.
In case you’re wondering, yes, renting camera gear is much cheaper than you think. We always rent our gear with Lensrentals, and the experience with them is always superb (check our Lensrental review here). They operate across the United States and it’s our choice when we need a particular lens or camera body.
Also, you’ll have a 15% discount when booking through our link.
15% OFF your Camera and Photography Gear Rental
PROMO CODE: CTA15

As a last note, just remember that the camera does not make the photographer but if you wonder what equipment we use, you can find it here.
