Learning how to take sharp photos is the aim of any photographer. It doesn’t matter what the photography genre is; our goal is to take razor-sharp images that highlight the important elements of our photographs.
However, there’s no magic button or trick to get the sharpest photos. It involves many factors, from how you hold your camera or place your tripod for taking sharper pictures to camera settings or software techniques to make your images sharper.
If you aren’t familiar with this topic yet, check our guide on sharpness in photography explained. Once that you understand that concept, it’s time to discuss how to take very sharp photos!
Below, you’ll find the 30 best tips to take extremely sharp photos.
1. Avoid Camera shake and vibrations to get sharp photos
The first thing to consider to take ultra-sharp images is that shakiness and sharpness in photography are inversely correlated: the more motion the camera body is subjected to, the less sharp your image appears due to motion blur.

1. Avoid camera shake to get sharp photos
Motion blur can come from several sources, from shooting handheld when you should be using a tripod to even small vibrations caused when pressing the shutter-release button.
Below you’ll find a few tips to take sharp photos related to camera shake.
2. hold your camera properly to take sharper images
If you want to get sharp photos every time, camera shakiness is the first thing you need to consider to avoid motion blur.
Holding your camera the right way is one of the basic photography tips for beginners. To do it properly, hold your camera at eye level with your feet at about shoulder width apart, with one foot in front of the other for greater balance.

2. Hold your camera properly
To add more stability, once the camera is at eye-level, keep your arms close to your body and shoot during the respiratory pause of your breathing cycle.
3. Follow the handheld photography rule
If you want to take crisp images, knowing when to shoot handheld is as important as holding your camera properly.

3. Follow the handheld photography rule
According to this rule, when you shoot handheld, you shouldn’t use a shutter speed slower than the focal length you’re shooting with.
For example, if you’re shooting with a 24 mm lens, you should use a shutter speed of 1/24s or faster if you want to take sharp photos handheld. Take this rule as just a general reference, since handheld photography also depends on your camera sensor size and other factors like image stabilization.
4. Turn on the image stabilization to achieve maximum sharpness
One of the best tips to take sharp images without a tripod is to turn on the image stabilization when shooting handheld.
Thanks to the improvements in vibration reduction technology, now we can shoot handheld at shutter speeds that were impossible just a few years ago, which allows us to take sharper images in wildlife photography and many other genres.


4. Turn on image stabilization
Just bear in mind that this technology consumes a lot of battery, and, if your camera is mounted on a tripod, you should turn it off to take sharper photos. Although it may seem contradictory, the image stabilizer “destabilizes” your photos if the camera is already stable when placed on a tripod.
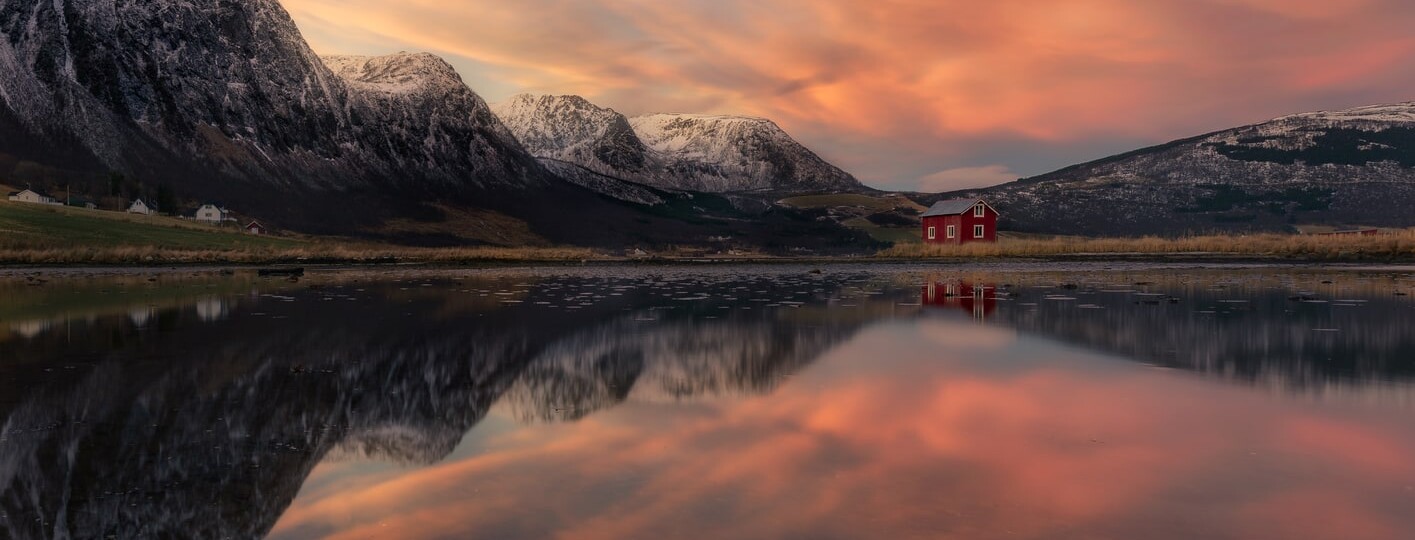
5. Use a tripod to take sharp landscape photos
All the previous tips to get sharper images are essential, but using a tripod is the best way to succeed in taking razor-sharp landscape photos (and other types of photographs too).
To take sharp images with a tripod, make sure that it’s steady and open over a stable surface. Try to keep it as low as possible, and don’t extend the center column unless it’s necessary. You should extend the legs from top to bottom, since the bottom legs are the more unstable ones; you should only extend them if necessary.

5. Use a tripod to take sharp landscape photos
Another tip to take sharper images with a tripod is to add your camera bag as a counterweight if your tripod has a tripod stabilizer weight hook.
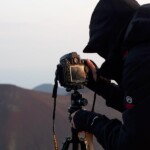
6. Use a remote shutter release to capture highly detailed images
If you want to take sharp long exposure photos, try to use a remote shutter release when you’re operating your camera on a tripod. You have two options for doing this:
- The first option is to use the built-in remote shutter in your camera. This internal remote allows different default shutter release times, like 2, 5, or 10 seconds.
- The second is to get a remote shutter release, something I recommend if you also plan to shoot time-lapses or ultra-long exposures in bulb mode. You can find both wired and infrared shutter release models.

6. Use a remote shutter release
Either way, I strongly recommend using a remote shutter to take sharp, bright photos if you’re using a slow shutter speed.
7. Use the mirror lock-up mode to take sharp photos with your DSLR
Motion blur can come from several sources. “Mirror slap” occurs due to the vibrations caused by the flipping of the mirror to allow light to reach the sensor in a DSLR.

7. Use the mirror lock-up mode if you shoot with a DSLR
If your DSLR has a Mirror Lock-Up mode, the camera will lift the mirror when the shutter is pressed. You can then press the shutter a second time to take sharp photos with your DSLR.
8. Watch the Shutter shock to get sharp images with your mirrorless camera
Mirrorless cameras don’t face the aforementioned “Mirror Slap” issue, but they can present another problem called “Shutter Shock” (also present in DSLR cameras). The technical problem is the same: vibrations in the camera but, in this case, caused by the mechanical shutter.

8. Watch the shutter shock in your mirrorless/DSLR camera
To avoid this issue and take sharper images with your mirrorless camera, you should enable the “Electronic front-curtain shutter,” also known as “EFCS”. This mode has some drawbacks when shooting fast action but will generally allow you to get sharp photos.
9. Make sure your focus is right to get the sharpest photos
Besides camera shakiness, the other key factor to take tack-sharp images is the focus.
Focus is crucial because missing the plane of focus can cause drastic losses in the perception of image sharpness. We want our lens to maximize the resolution potential of our camera, and for this, our subject(s) need(s) to be in focus.
Having your subject in focus is also vital for getting crisp images because it’s something that’s difficult to fix in post-production. You can make some small improvements if you slightly miss focus. However, few software corrections can make up for the lost perceptual resolution created by an out-of-focus lens.

9. Make sure you use the right focus to get the sharpest photos
Below, you’ll find more tips related to how to get a sharp focus in your images.
10. focus manually to take sharp images in low light
Autofocus is usually more convenient, but there are still some cases where it’s unreliable, and you have to focus manually, like in Milky Way photography or Northern Lights photography.

10. Focus manually to take sharp images in low light
One of the best tips to take sharp images with manual focus is to use a tripod. To do it, turn on the live view mode, zoom in on a distant light like the moon or a bright star, and move the focus barrel slowly until everything looks crisp.
This is the best tip to take sharp photos of stars. You can find more in-depth information on how to take sharp night photos in our guide to shoot the Milky Way.
11. Use focus peaking to get sharp photos with manual focus
If you’re using the manual focus to take sharp photos in low-light or other situations, most modern cameras include focus aids like “focus peaking.”
Using focus peaking, your camera highlights the areas that are in focus in your image in a bright color so you can adjust and take sharp images using manual focus.

11. Use focus peaking to get sharp photos with manual focus
Focus peaking is also a game-changer when using fully manual lenses like the Rokinon, Laowa, and other lenses to shoot the Milky Way.
12. Set the best camera autofocus mode to ensure maximum sharpness
Depending on your subject, using the right autofocus mode is fundamental for getting the sharpest images. In general, to capture more details in your images depending on your subject, you should use the following focus modes:
- Autofocus Single (AF-S): To take sharp landscape photos and other static subjects.
- Autofocus Continuous (AF-C): To get tack-sharp bird photos, sports, and other moving subjects.
- Autofocus Hybrid: To take sharp group photos and other situations where the subject can be static or moving.

12. Adjust the right autofocus mode
You can dive deeper into this topic in our article on autofocus modes in photography.
13. Use the right focus area mode to get pin-sharp photos
Along with the focus modes, it’s important to select the best autofocus area mode to help fine-tune how and where your camera seeks to focus within a scene.
The main focus area modes to get sharp focus in your images are:
- Single-point area mode: To take sharp photos of landscapes and other static subjects.
- Dynamic-area mode: To take sharp action photos and other moving subjects.
- Group-area mode: To take sharp photos of groups.
- Eye AF area mode: To get tack sharp portraits of people and wildlife.

13. Use the best focus area mode according to your subject
We also explain all this in our article on focus modes.
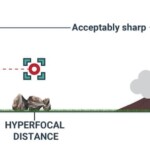
14. Focus on the hyperfocal distance to take sharp landscape photos
Besides using a tripod, the best tip to get sharp landscape photos is to focus on the hyperfocal distance when you want both the foreground and background to be in focus.
Focusing on the hyperfocal distance, you’ll maximize the depth of field, and everything from half that distance out to infinity will be acceptably sharp.

14. Focus on the hyperfocal distance
You can see more information and examples in our article on the hyperfocal distance.
15. Enable the live view mode to get the sharpest photos in camera
Live view mode consumes more battery, but it works wonders when you need to nail the focus to take the sharpest images.
In my case, when I shoot using my tripod, on most occasions, I enable the live view mode to check that everything is tack-sharp or to decide if I need to increase my sharpness with more advanced techniques like focus-stacking.

15. Enable the Live-View Mode
This is also the best tip to take sharp macro photos and wide landscapes.
16. Set the right camera settings to make your photos sharper
Sometimes we take it for granted, but one of the best tips to take sharp photos is to adjust the best settings in-camera.
Aperture, shutter speed, ISO… all the basic camera settings involved in the exposure of a photograph also affect the sharpness of your image to a great extent.
Following this, the best settings for taking sharp photos are achieved by considering how the elements of the exposure triangle contribute not only to exposure but also to image sharpness.

16. Set the right camera settings to take tack-sharp photos
Below, you’ll find the best settings to take razor-sharp photos!
17. Use the right aperture to take sharp, bright photos
Aperture is the first setting to adjust to take sharp photos with your DSLR or mirrorless camera.
Simply put, using narrow apertures allows you to maximize the depth of field, and therefore, to take sharper images. However, a very narrow aperture will create diffraction problems, decreasing the detail of your images. Use apertures around the “sweet spot” of your lens, which is usually 2 to 3 stops down from the maximum aperture of your lens.
You can also use a wide aperture to take sharp photos with a blurred background, but you need to be careful where you set your focus, since the depth of field will be very shallow.

17. Use a narrow aperture to maximize the depth of field
You can find more in-depth info in our guide to photography aperture.
18. Set the best shutter speed to avoid motion blur
Shutter speed is an essential basic setting to ensure the maximum sharpness. If your subject is moving and you’re not using the right shutter speed, your image will be blurred.
For instance, to take sharp photos of birds in flight, sports, and other fast-moving subjects, you’ll need to use a fast shutter speed.
You can also use a slower shutter speed creatively to take sharp long exposure photos, but some elements like water and clouds will have a very different look when you do long exposure photography. Adjust the shutter speed according to your subject and goals.

18. Use the right shutter speed according to your subject
Shutter speed is essential if you want to get sharp photos. You can learn more in our guide to shutter speed in photography.
19. Know the ISO Limits of Your Camera to take cleaner images
Spend a bit of time playing with your camera in low light, and see what the best ISO to get sharp photos is and at what ISO settings digital noise starts to become an issue.
Full-frame cameras offer the most leeway because the larger light-gathering sensor area lets you keep the ISO values lower compared to crop-sensor cameras. However, regardless of the camera you use, there are different tips to reduce the digital noise in your photos that I recommend you know.

19. Don’t push the ISO beyond the limits of your camera
If your goal is to take sharp photos in low light, be careful since digital noise and sharpening in post-processing don’t work well together. If you try to increase the detail in your image by using the sharpening slider in post-processing, depending on the program you use, you may also enhance noise and other artifacts.
You can master this topic with our guide to ISO in photography.
20. Consider the depth of field to take sharp photos
To take very sharp images, depth of field is a critical element. The right DOF will ensure that the area of your frame where your important subjects lie is acceptably sharp.
As we saw before, the main element related to depth of field to take sharper photos is aperture, but other factors affect the depth of field like the focal length you use, the focusing distance, and the camera sensor size.

20. Consider the depth of field
It doesn’t matter if your goal is to take sharp landscape photos or get sharper portrait images with a blurry background; you need to understand how depth of field in photography works!
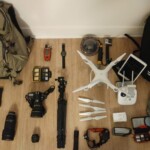
21. Use the right gear to take clear pictures
The most overlooked factor when trying to take tack-sharp images is our camera gear.
We may have an in-depth knowledge of camera settings, but you won’t get sharper photos unless you use the right gear according to the genre and scene.

21. Use the right gear to take clear pictures
Our cameras and lenses are the most critical elements, and don’t worry – you can even take sharp images with your kit lens! But there are a few things to consider, along with other factors that can make our pictures less clear like camera lens filters.
Now, let’s see the best gear to take razor-sharp shots!
22. Make sure you’re using the right camera (and your sensor is clean!)
Taking sharp images with an entry-level camera is easy in some genres, like landscape or portraiture.
However, if you’re shooting wildlife or sports photography, the focus speed of your camera will play a huge role in taking tack-sharp photos all the time.

22. Make sure you’re using the right camera
Your camera sensor size is also important since it’ll affect the image quality and resolution of your final image, something vital if you want to take sharp pictures for printing.
Lastly, don’t forget to clean your sensor! Especially if you plan to take sharper images with a mirrorless camera, since sensors in this type of camera usually accumulate more dust spots.
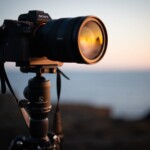
23. Select the best lens to get nice, sharp images
Your camera lenses are a key factor affecting photography sharpness; if you don’t pair your camera with the right lens, your final image won’t be as crisp as it could be.
You can take sharp images with a kit lens. However, this type of lens usually takes softer images compared to more specific lenses.
The best tip to get sharp photos with your prime or zoom lens is to use a quality lens that’s compatible with your camera. Native lenses usually offer the highest quality since they’re designed by the same manufacturer, but there are also third-party quality lenses like Sigma or Tamron.

23. Select the best lens
Make sure that you’re using a fast lens if you need to freeze the movement of your subject with a fast shutter speed or if you want to take sharp night photos, since this will allow you to use a lower ISO.
24. Be careful when using camera lens filters
Camera lens filters are great creative tools to polarize, shoot long exposures in daylight, and perform many other functions.
However, they can be a double-edged sword if you aim at taking the sharpest images.
Light can filter through ND filters when taking ultra-long exposures, which results in artifacts and color casts that are difficult to fix.

24. Be careful when using camera lens filters
Others, like UV filters, have an impact on the final crispness of your images. In my opinion, there’s no point in investing a considerable amount of money in a top-quality lens to later place a cheap piece of glass in front of it.
My tip here to take sharp photos is to use your camera lens filters wisely and to avoid using UV filters.
25. Use the best software to get the sharpest possible photos
Once you keep camera shakiness under control and use the right focus, settings, and gear, the best tip to get the sharpest possible images is to use photography software.
There are many different forms of software you can use. You can make the picture sharper in Photoshop or use a noise reduction plugin, increasing the perception of sharpness.

25. Use the best software to get the sharpest photos
Remember that if your image is completely out of focus, there isn’t miraculous software that will be able to fix it, but if it’s slightly blurred, you can use some software to fix blurred images.
Lastly, If you need to enlarge your images to create a quality print, I highly recommend a tool called Gigapixel AI that allows you to upscale your images without compromising the quality. You can check here my review and tutorial on how to enlarge images with Gigapixel AI.
Keep reading to find out the best software techniques to get sharper photos!
26. Start your workflow by applying capture sharpening
When working in post, we have several techniques to get sharper shots available to help enhance the final result.
Initially, we want to apply capture sharpening to the entire imported RAW file for making the picture sharper in Lightroom/Photoshop. When shooting JPEG, the camera usually applies capture sharpening to the final image, so consider this if you shoot in RAW.

26. Start applying capture sharpening
Raw files are the best at capturing as much information in your images as possible. However, when you shoot in RAW, photos come out “soft” straight out of the camera.
Even if you’re not fond of post-processing, applying capture sharpening is the basis for getting sharper photos, and you should always do it in your images.
27. Apply selective sharpening to get your subject sharp
Next, you should creatively apply selective sharpening as needed. Sometimes, a particular group of trees benefits from crisper foliage, or a rocky outcropping has fine details you want to bring out.
You can do this in any basic editing software using selective tools, such as gradient filters, radial filters, or the brush.

27. Apply selective sharpening to your main subjects
To be more precise, my tip is to make your photo sharper in Photoshop. You can do this by drawing a Layer Mask over the portion of the image that you want to enhance, and applying selective sharpening using any of the sharpening tools available in Photoshop.
28. Adjust the Noise Reduction to get sharper images
Noise reduction affects the softness and detail of an image. On the one hand, noise reduction improves the appearance of an image by softening grain and color noise. However, we also lose acutance and detail if the noise reduction is excessive.
Sometimes, we can even get the perception of sharper images by adding grain in post-processing. Image grain is easy to control and can make our images more realistic in certain situations.


28. Adjust the noise reduction without losing sharpness in your images
If noise is making your image less sharp, the best tip to get sharper images is to use any of the best noise-reduction software on the market.
My favorite, in this case, is Denoise AI, since it’s the best software at maintaining detail after applying noise reduction. You can see our full review of Denoise AI here.


29. Use advanced software to recover out-of-focus images
Sometimes, you can follow all the best tips to take tack-sharp photos, but there are unexpected circumstances: a wind gust shaking your tripod, a sudden movement of your subject… there are many situations when taking the sharpest image is out of our control!
In those cases where you slightly miss the focus, you can use any of the best software to make blurry pictures clear to recover and make your image sharper.


29. Use software to recover and sharpen out-of-focus images
In this case, I always recommend using Sharpen AI. It helped me recover many blurred, special images, and it truly works like magic! You can see our full review of Sharpen AI here!
30. Apply output sharpening according to the final destination of your image
Lastly, we need to select the right output sharpening for our end destination.
For instance, on some surfaces, the ink can spread across the print, causing a loss in perceived resolution.
Many email providers and websites, especially social media sites, compress images to save storage space. This strips them of data and causes visible losses in detail.


30. Apply output sharpening according to the final destination
In both cases, either if you want to get sharper images for print or get sharper images on Facebook, we need to add output sharpening before or when exporting our final files.
If you want to print one of your photos in a large size and you need more resolution than the camera itself gives you, I recommend using Gigapixel AI.
Conclusion
As you can see, learning how to take sharp photos requires you to have many different photography aspects in mind.
The most common mistakes keeping us from taking sharper images are those related to camera shakiness and focus, so I recommend going over those first to take tack-sharp shots.
All the tips to capture sharp photos related to camera settings and gear are usually overlooked, so keep a close eye on those too, since they are key factors affecting image sharpness.
Last but not least, to get super sharp photos, you’ll need to use some software to apply capture, selective, and output sharpening. Don’t forget that there’s also software available to reduce noise and fix out-of-focus images in case something goes wrong!
I hope you found these tips useful and that they help you take ultra-sharp photos on your next shoot!
Do you know any extra tips to take sharper photos? Feel free to share them in the comments below!


Dear Dan,
That tutorial was remarkably interesting and helpful! Your kindness of sharing your knowledge is very much appreciated! I do love to read all your articles! Thank you very much you do a, great job!
Thanks so much for your nice words Pascal! Glad to see our articles are being helpful!