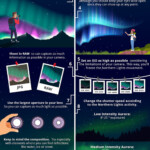
To photograph the Northern Lights, a good starting point is: aperture f/2.8 or the widest possible in your lens, ISO 3200-8000, and a shutter speed between 1-12 seconds, depending on the Northern Lights activity. The quicker the Aurora moves, the faster your shutter speed should be.
However, photographing the Northern Lights goes beyond these settings. I still remember how excited I was before my first Northern Lights trip and how challenging it was to capture the Aurora Borealis.
If you want to learn how to photograph the Northern Lights and skip the trial and error, keep reading. I’ve prepared this Northern Lights guide where you’ll find the best way to photograph the Northern Lights like an expert!

Choosing the right settings to photograph the Northern Lights is crucial
In a nutshell, these are the best settings to photographing the Northern Lights:
- Use an aperture of f/2.8 or the widest in your lens
- Adjust an ISO from 3200 to 8000
- Set a shutter speed between 1-12 seconds
- Adjust your white balance to 3500k
- Focus manually on a distant light
- Set the general camera settings for Northern Lights
- Select a shutter delay of 2 seconds
- Check your Northern Lights shot histogram
Also, after the best steps, you’ll find a section with the best gear, compositions, and tips to photograph the Northern Lights.
Additionally, if you want to learn how to photograph the Northern Lights with a smartphone, I’ve got a section to cover your needs! Phones these days are capable of capturing some impressive Northern Lights photos.
GET YOUR FREE EBOOK!
- PHOTOGRAPHING THE NORTHERN LIGHTS -
BEST SETTINGS, GEAR, PLANNING, TIPS, AND MORE!

1. Use an aperture of f/2.8 or the widest in your lens
The aperture is the first setting you must adjust to take pictures of the Northern Lights.
To shoot the Northern Lights correctly, it’s fundamental to choose the best exposure settings for Northern Lights photography: aperture, ISO, and shutter speed. The goal is to adjust these settings so you can capture as much light as possible while using a short shutter speed according to the movement of the Aurora.
The key in Northern Lights photography is to set the widest aperture in your lens to capture as much light as possible.
If you can, try to use an aperture of f/2.8 or lower. The wider the aperture, the more quality you’ll see in your Aurora images with less digital noise. For this, it’s important to use a good lens for Northern Lights.

2. Adjust an ISO from 3200 to 8000
Using the best ISO for Northern Lights photography is crucial. It will allow you to have the right exposure using a shorter shutter speed, which is the ultimate goal in Aurora Borealis photography.
To capture the Aurora, raise your camera’s native ISO as high as possible, ideally between 3200 and 8000. However, the right ISO setting for the Northern Lights depends on three main factors:
- Your camera: It varies from one model to another, but generally, high-end cameras with Full-Frame sensors can set a higher ISO for capturing the Northern Lights, usually between ISO 5000 and 12800.
If you use an entry-level camera with a crop sensor and you raise your ISO over the limit, you’ll likely find digital noise and you won’t get a quality image. With this type of camera, I recommend maintaining an ISO of 6400 or lower.
We’ll see more about the best cameras for Northern Lights below.
- The moonlight: When there is a big, and bright moon illuminating the landscape, set a lower ISO between 800-3200 depending on the brightness.
- External artificial lights: If you’re photographing the Northern Lights in a scene with external lights, such as the street or house lights, you should set a lower ISO, or the highlights will be blown out in your Aurora shots.

2. Adjust an ISO from 3200 to 8000.
To capture clear and sharp shots, I recommend checking our article on how to take noise-free images. After all, if you find some noise in your photos, don’t worry; you can always eliminate it using any of the best noise reduction software.
3. Set a shutter speed between 1-12 seconds
The last and most important exposure setting for Northern Lights photography is the shutter speed. The exposure time is the most challenging setting for shooting the Northern Lights, mainly for one reason: the Aurora Borealis is unpredictable.
Unlike other types of night shots like Milky Way photography, where the stars determine the maximum exposure time, the shape and brightness of the Aurora constantly change. This means you must adjust the shutter speed according to every specific situation.
Generally speaking, the stronger, more dynamic, and brighter the Northern Lights are, the faster the shutter speed you need to freeze the shape and movement of the Aurora in your Northern Lights images.

3. set a shutter speed between 1-12 seconds
- You can use this guide to set your shutter speed for the Northern Lights as a reference:
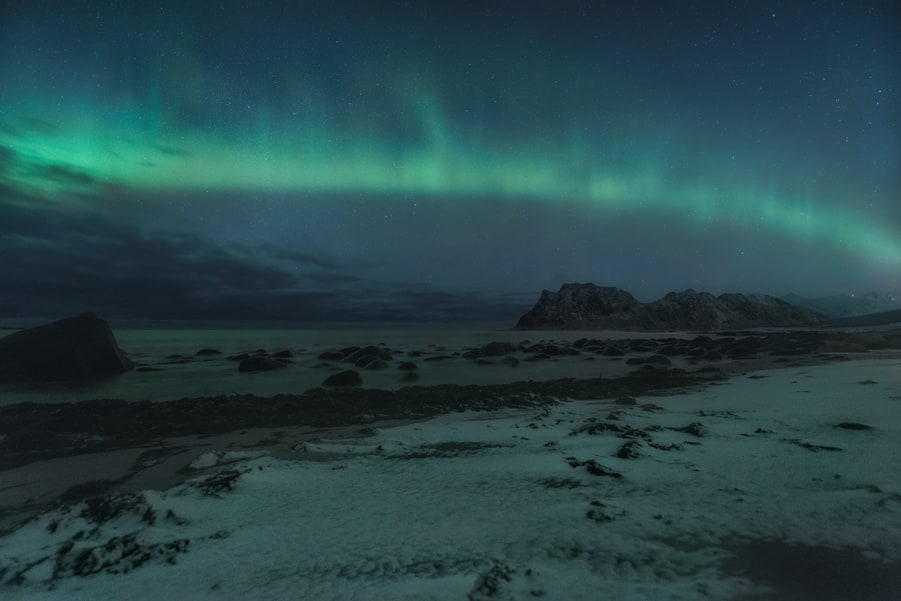
- Faint and static Auroras: When the Auroras are weak and not clearly visible to the naked eye, use a shutter speed between 8 and 12 seconds.
- Vibrant Auroras: If the Northern Lights are visible to the naked eye and show some movement, your shutter speed should range between 3 and 8 seconds.
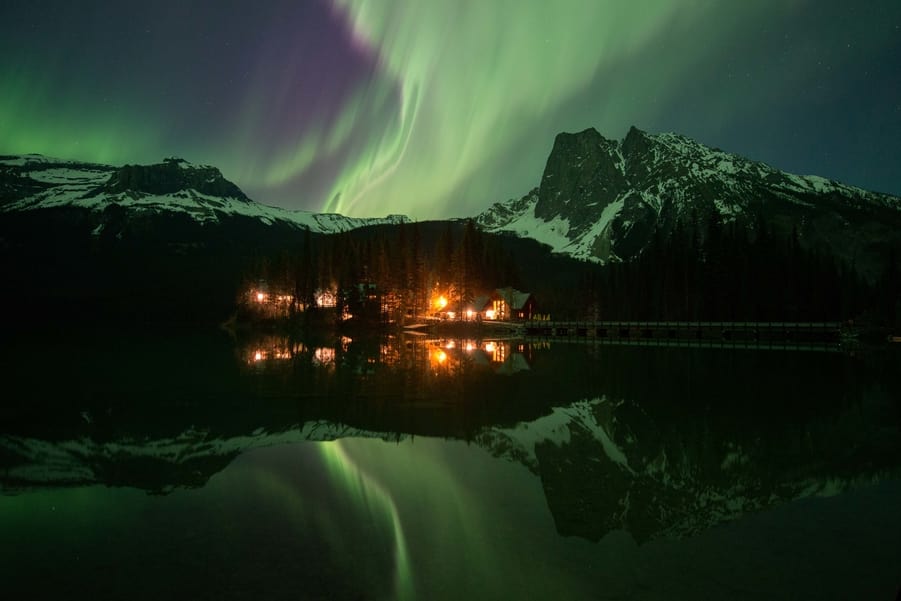
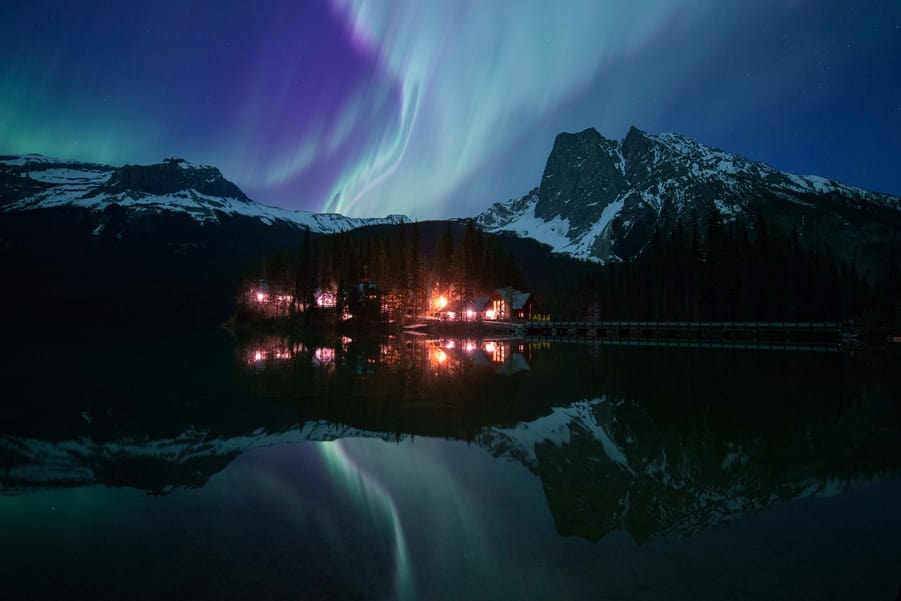
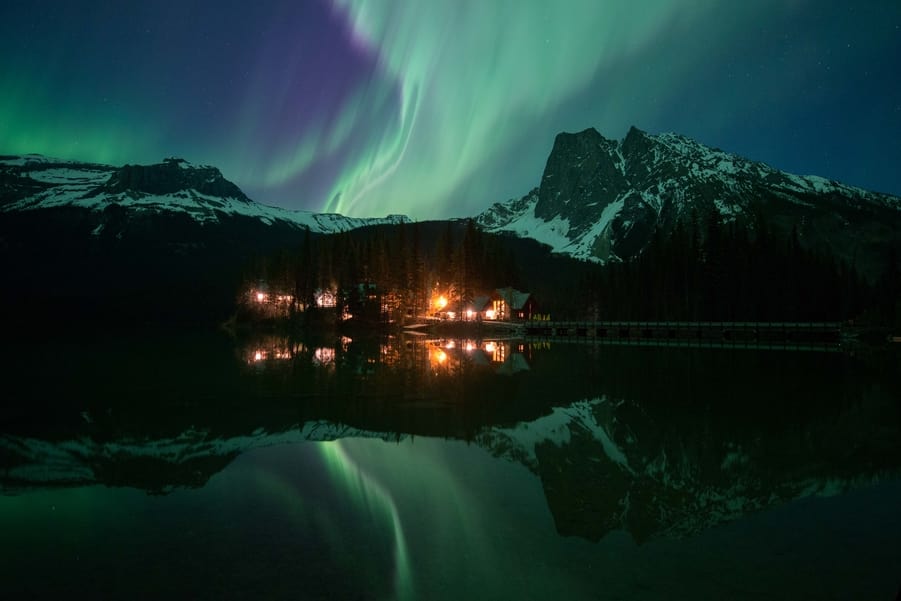
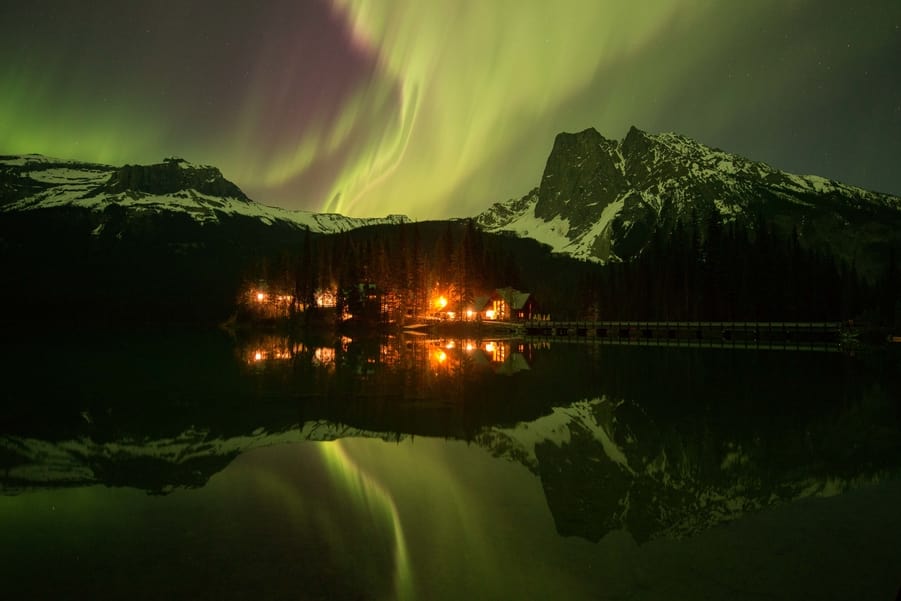
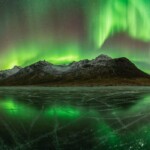
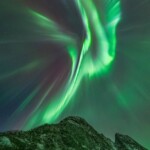
4. Adjust your white balance to 3500k
In Northern Lights photography, you should always set a manual White Balance.
A good starting point is to set your Northern Lights white balance around 3500 Kelvin, which is when the Northern Lights show a more natural color.
Although you can change the white balance in post-processing when you shoot in Raw, it’s better if there’s color consistency in your Aurora images. Besides, it’ll make your Northern Lights editing step faster.
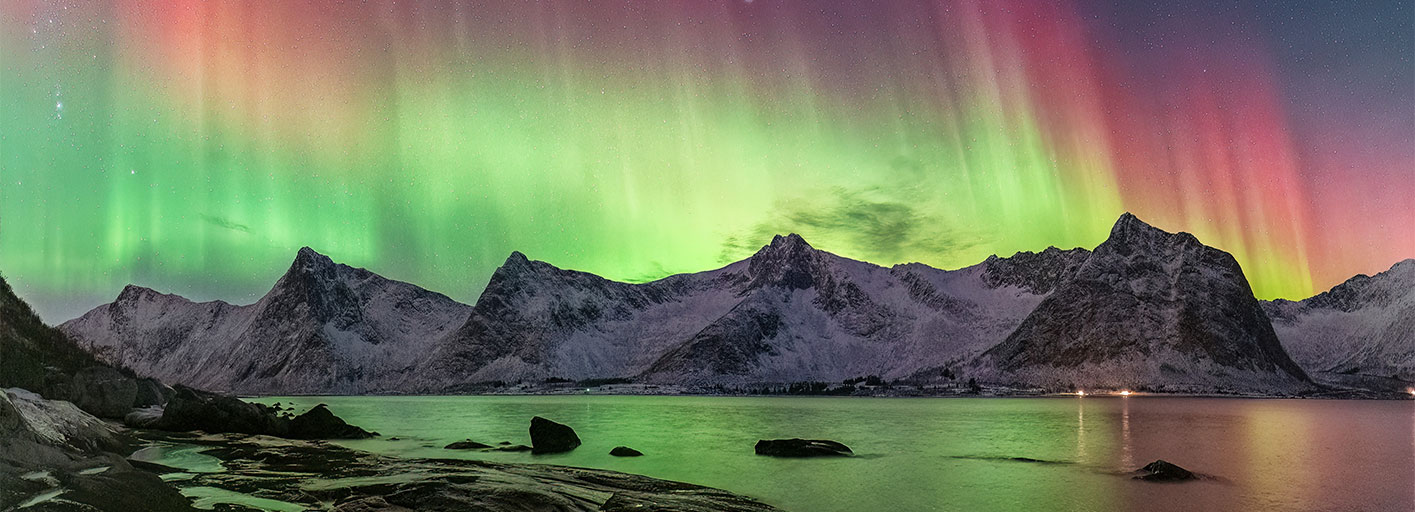
This is especially important when the Aurora spreads across the sky and you want to take a Northern Lights panorama.

4. Adjust your white balance to 3500k
Here you can see a series of examples of how the Northern Lights look when captured using different white balance settings.
5. Focus manually on a distant light
To avoid this common mistake, I suggest following these steps to achieve perfect focus on your Northern Lights images:
- To focus at night, set the live view mode on your camera, zoom in on a distant light, like the moon or a bright star, and move the focus ring of your lens manually until you can find the sharpest point.
Some cameras can automatically focus at night, but most struggle to do this, so I always recommend adjusting the focus manually in low-light conditions.
Important note: Regardless of the focus method, once the focus is set, leave the focus mode as manual, and don’t move the focus ring during your entire Northern Lights session unless you change your lens or focal length.
Another critical tip for focusing in Northern Lights photography is to open the captured image on your LCD screen and zoom in on the stars to check if your focus is correct.
I try to do this from time to time during an Aurora session, especially when I move from one location to another since you can accidentally move the focus ring. This is one of the best tips for focusing in photography.
Many photographers recommend focusing at the hyperfocal distance, but if you want to make sure that your stars are perfectly sharp, I don’t recommend this method.

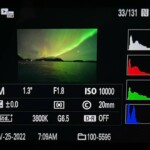
6. Set the general camera settings for Northern Lights
The general camera settings for Northern Lights are not very different from the common long exposure night photography settings. Before taking pictures of the Northern Lights with a Mirrorless or DSLR camera, I always suggest adjusting the following settings:
- Screen brightness: First, turn down your LCD screen brightness. That way, you’ll see a more realistic preview and avoid underexposing your Aurora shots.
- Shoot in RAW: Do this to capture as much information as possible, both in the highlights and the shadows. This is fundamental for post-processing in Northern Lights photography.
- Long exposure noise reduction: Turn this setting off. This will slow your camera down, and you can’t miss a second while chasing the Aurora. You can reduce the noise in post-processing using Denoise AI or another piece of software which is more effective than in-camera.

6. Set the general camera settings for Northern Lights
7. Select a shutter delay of 2 seconds
To take the sharpest images, ensure your camera is on a steady tripod and set a shutter delay of 2 seconds. If it’s windy, you can change the delay to 5 seconds to avoid any possible vibrations when you press the shutter button.
You can also use a shutter release or an intervalometer. Since shooting the Northern Lights requires you to move according to the movement of the Aurora, I’m usually more comfortable using the internal shutter delay. I just use the intervalometer when I’m shooting a Northern Lights time-lapse.

8. Check your Northern Lights histogram
To verify that you are using the correct settings for your Northern Lights images, always play the image on the back of your camera.
Zoom in on the stars and check if everything is in focus. Then, check the histogram in your Northern Lights photographs. You can learn how to read the histogram here.
The camera brightness, external lights, and general light conditions can trick your eye when you check the Aurora images on your camera screen, so the best way to take Northern Lights pictures while ensuring that the exposure is correct is by checking the histogram.
Ideally, the histogram should tilt towards the left, but don’t clip the blacks. It’s crucial to check that you aren’t clipping the highlights, which is very common when the Aurora activity increases.

8. Check your Northern Lights histogram
As you can see, shooting the Aurora is not difficult if you know the basics. This is a summary of all the steps you need to follow to photograph the Northern Lights:

However, in Northern Lights photography, there are other factors to consider beyond the main camera settings. Below, we’ll dive into other fundamentals that will set you up for success when chasing the Norther Lights.
- Best camera gear for Northern Lights
- Composition for taking Aurora images
- Other tips on how to shoot the Northern Lights
- How to photograph the Northern Lights with a smartphone
Best camera Gear for Northern Lights photography
Having the right camera gear for Northern Lights photography is essential to get the best possible images.
CAMERAS FOR NORTHERN LIGHTS
Regarding cameras, there’s a significant difference between Full-Frame cameras and cameras with smaller sensors. Yes, you can photograph the Northern Lights with a GoPro, compact camera, or even an iPhone, but don’t expect the same quality.
Full-frame cameras are the best because they have bigger pixels that allow your camera sensor to capture more light. In this range, cameras with fewer megapixels are better for the Northern Lights. (More info about this in our camera sensor size article).
You can find more information about what makes a great camera for Aurora photography and the best models in my guide to the best Northern Lights cameras in 2023.

LENSES FOR AURORA PHOTOGRAPHY
Camera lenses are as equally important (or even more) than the camera. The easiest and most effective way to photograph the Aurora is by using a fast wide-angle lens.
Any focal length between 12mm and 24mm will allow you to capture a reasonable area of the night sky and the ground. Prime lenses are usually faster and lighter, but they’re less versatile than zoom lenses. This is a matter of taste; zoom lenses make photography composition easier, while prime lenses will provide the best quality, especially those with an aperture of f/1.8 or below.
You can find a full list of the best models in my article on the best lenses for Northern lights in 2023.
Other pieces of gear for the Northern Lights
Some other pieces of gear that you’ll need are the basics for any type of night shooting, like a tripod, headlamp, intervalometer, etc.
I highly recommend taking some photography gloves to stay warm during your session. Shooting the Aurora at high latitudes can be challenging, especially during winter. In my case, I always wear the Heat 3 Smart photography gloves from The Heat Company.

Camera gear is fundamental in Northern Lights photography.
A good tip related to camera gear for the Northern Lights is to rent a camera or lens for your trip to see the Northern Lights. High-end camera gear is expensive, so sometimes renting for a particular trip makes sense, especially if it’s your first time shooting the Aurora and you don’t know if you’ll use it again.
In my case, I always like testing new lenses and cameras during my Northern Lights Photo Tours, and I always rent with Lensrentals. They operate within the US, and you can get a 15% discount using the code CTA15.
Composition for Northern Lights pictures
Once you know the basics of capturing the Northern Lights, the most common mistake I’ve seen is not giving enough importance to composition.

Always keep an eye open for a powerful composition
The initial reaction, especially if it’s your first time photographing the Aurora, is to point your camera to the sky and shoot.
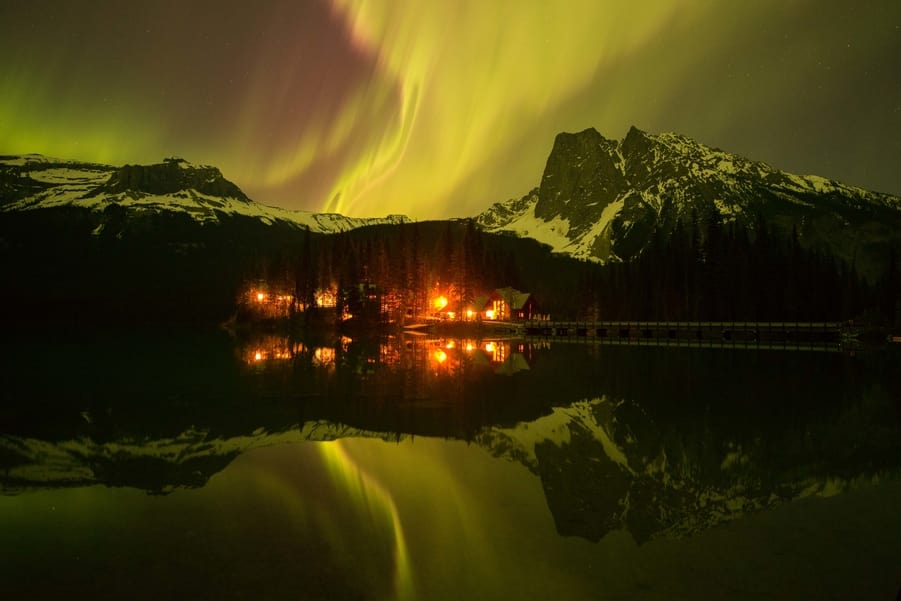
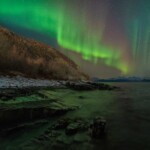
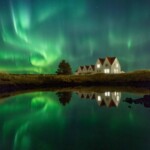
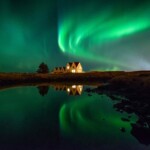
Sometimes, the Northern Lights are so vivid and colorful that just a picture of the sky with the Aurora can be beautiful. However, in most cases, the best way to photograph the Northern Lights is by creating a composition as if you were capturing a normal night scene, considering not only the sky but also the ground.
Although you can find the best photography composition rules in this article, here are a few tips on Northern Lights photography composition:
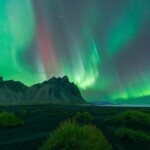
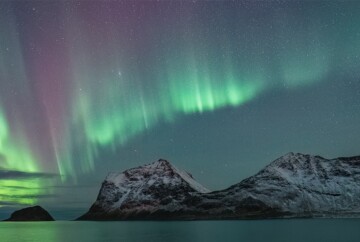
- Look at the sky, but don’t forget about the ground.

The foreground elements will wrap up your Norther Lights photo
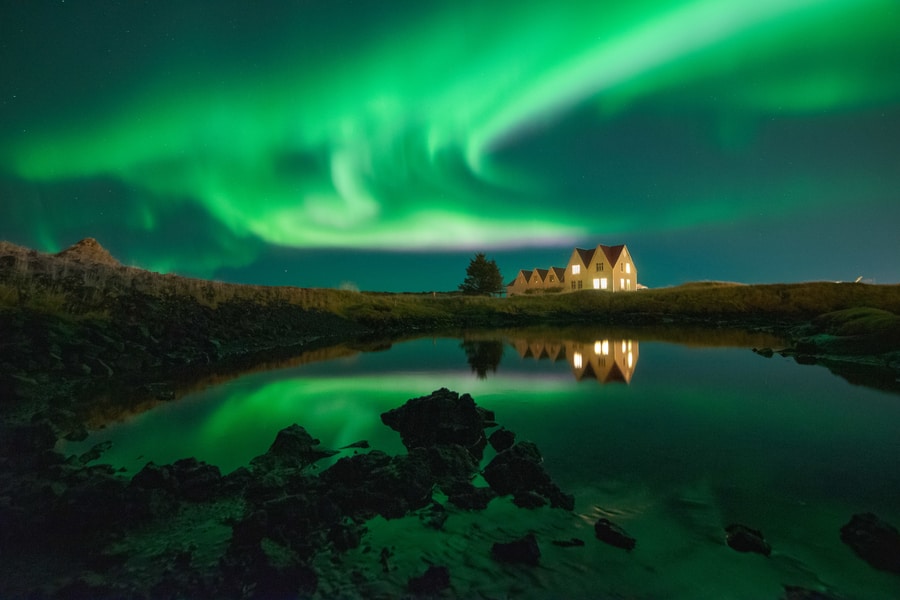
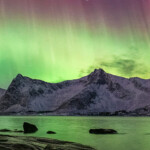
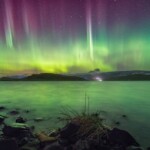
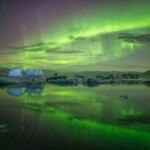
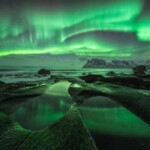
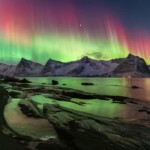
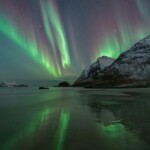
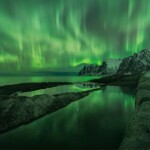
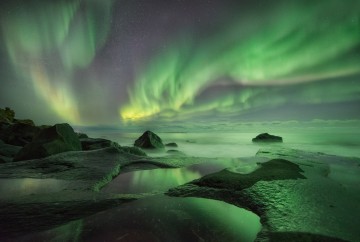
- Try to include elements that can reflect the Aurora, like water, snow, or ice.

Ice and still water make for great reflections
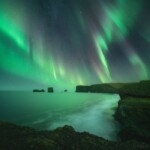
- Be flexible and look for compositions according to the movement of the Aurora.

Be flexible and creative with your compositions
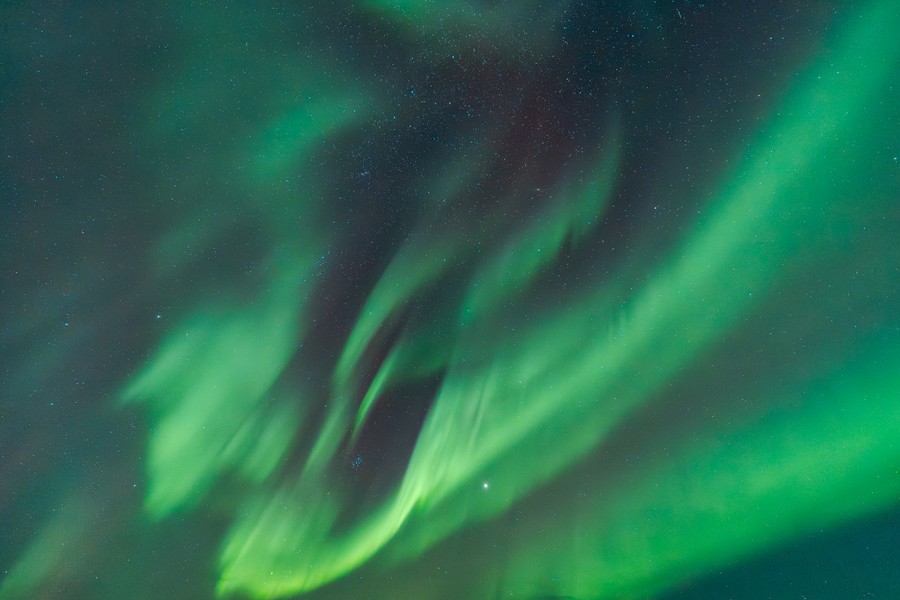
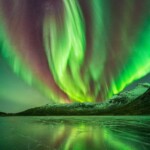
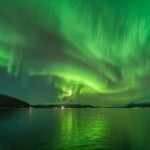
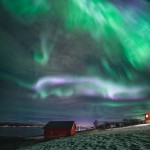
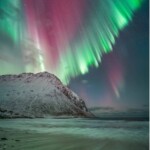
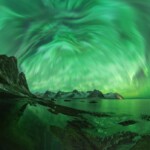
- Use vertical compositions when the Aurora forms the famous “Northern Lights crown.”

Vertical images allow you to capture more of the scene
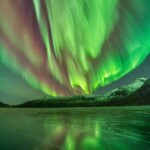
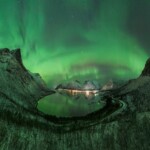
- Create panoramas when the Northern Lights “dance” across the whole sky.

Push your creativity by creating Northern Lights panoramas
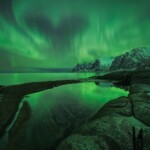
- If you manage to capture a mirror reflection, place the horizon in the middle of the frame.

Try to find symmetry in your Northern Lights images
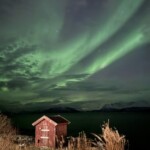
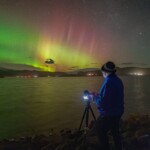
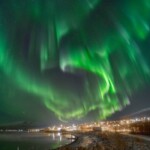
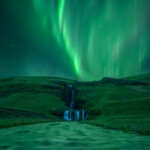
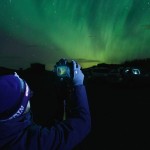
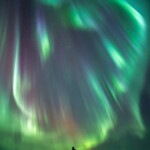
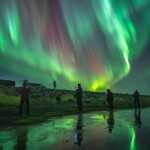
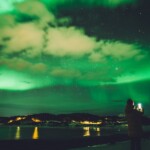
- Use human elements to give some sense of scale.

Use people in your compositions to give a sense of scale
Other tips on how to photograph the Northern Lights
At this point, you already know how to photograph the Northern Lights like an expert, but here are a few tips for shooting the Aurora that’ll help you take your images to the next level:
1. Plan your Northern Lights photos
In landscape photography, all good shots start from good planning, and when we’re talking about the Northern Lights, it’s even more important.
Be sure to plan your trip to the Arctic with the best time to see the Northern Lights. Also, find the best places to see the Northern Lights at your destination. In the following articles we have written, you will find more detailed information:
- When and where to see the Northern Lights in Iceland
- When and where to see the Northern Lights in Norway
- When and where to see the Northern Lights in Canada
- When and where to see the Northern Lights in Alaska
- When and where to see the Northern Lights in Finland
- When and where to see the Northern Lights in Sweden
- When and where to see the Northern Lights in Michigan
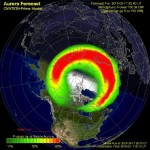
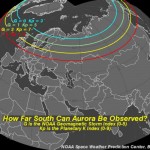
2. Learn how to read the Northern Lights forecast
If you already know what causes the Northern Lights, you will be familiar with the KP index, which will determine the chances of seeing the Aurora at your latitude and how intense the lights will be.
If there is a great solar storm, the KP index will be high, which is the best time to photograph the Northern Lights.
To check it, visit a website like Space Weather Live or NOAA. We have a specific article about how to read the Northern Light forecast.
If the forecast is positive, be ready!

Learn how to read the Northern Lights forecast
3. Look for clear skies to photograph the Northern Lights
It could be the biggest Northern Lights display of the year, but you’ll miss it if the skies are cloudy. Try to go to an area with potential clear skies before photographing the Aurora.

Look for clear skies to photograph the Northern Lights
My favorite weather forecast sites for the Aurora, depending on your location, are:
4. Use the best app to photograph the Northern Lights
Even if the forecast isn’t very promising, the Auroras are unpredictable and may appear suddenly. If you don’t want to miss the show, I recommend downloading the best Northern Lights app, “My Aurora forecast.” It’s free, and it also includes alarms and notifications in case there is a sudden KP increase in your location.

Also, this app for photographing the Northern Lights will show you the Aurora forecast by minute, hour, and day and the cloud coverage in your location. For me, it is one of the most effective and simple Aurora apps.
5. Shoot a Northern Lights time-lapse
If taking pictures of the Northern Lights is exciting, imagine capturing the lights dancing in the sky. The only way to capture this movement with the highest quality is by shooting a time-lapse of the Northern Lights.
To do this, use an intervalometer and set intervals of 1 second. Simply take into account the camera settings for Northern Lights photography explained above.
Plan at least 100 to 300 shots to capture the movement of the Aurora. Then, put them together using the LRTimelapse software. The result will leave you in awe!
6. Get inspired by the best Northern Lights images
Do you need some inspiration to photograph the Northern Lights? Take a look at this compilation of the best Northern Lights images!

Get inspired by the best Northern Lights images.
These images will show you how some of the top landscape photographers compose and capture the best Aurora images worldwide in places like Finland, Iceland, Norway, Canada, Alaska, and even the UK.
7. Join me on my next Northern Lights CAPTURE THE ATLAS PHOTO TOUR
You may already know the best camera settings for Northern Lights photography, but you’ll find many challenges when you are in the field.
if you’re a passionate photographer and you’d like to learn from professional Aurora photographers, I recommend joining one of our Northern Lights photography tours! We’d be happy to have you on our Northern Lights Iceland photo tour or our Lofoten Islands photo tour in Norway, where we focus on chasing and shooting the Aurora with a small group of passionate photographers!

Join me on the next Capture the Atlas photo tour
Besides, in our Northern Lights photo tours, we’ll photograph some of the most incredible landscapes on our planet. Would you like to join us?
How to Photograph the Northern Lights with a Smartphone
Before we finish, it’s good that we also cover how to take pictures of the Northern Lights with a smartphone.
Phone cameras keep getting better and better each year, and most phones these days can take stunning Northern Lights photos. The quality might not be the same as using a DSLR or mirrorless camera, but if you are looking for a quick way to photograph the Northern Lights and share with friends and family, chances are your smartphone can take beautiful images of the Northern Lights.

You can capture beautiful images of the Northern Lights with a smartphone
Learning to photograph the Northern Lights with your smartphone is very easy and straightforward; follow these simple steps and let the results shine for themselves!
- Open your camera app on the phone
- Set the camera app to night mode. Some devices, like iPhones, automatically switch to night mode when they detect low light in the scene.
- Point the phone where you want to take the Northern Lights photo.
- Hold the phone with both hands and tap the shutter button.
- Stand still for 3 seconds. You’ll find a reference point on the screen; try not to move out of that frame.
- Check your Northern Lights photo.
Additionally, if you have a tripod with a phone adapter, you can mount your phone to the tripod to take even longer exposures, like 10 seconds. In high-end phones, you can use manual mode, and follow the same settings for aperture, shutter speed, ISO and white balance as mentioned above for cameras.
These are some examples of Northern Lights photographs taken with smartphones to inspire you:

Northern Lights image taken with an iPhone 15 Pro

Northern Lights photo taken with a Google Pixel 7 Pro
Conclusion
Northern Lights photography is probably one of the most challenging genres to learn and master. There are many factors that you can’t control, such as the Aurora activity or cloud coverage.
However, if you know your camera gear, the best Northern Lights settings, and how to create interesting compositions, your chances of capturing beautiful Aurora images will increase drastically.
I hope this Northern Lights photography guide helps you succeed in your Aurora shooting experience, and you can return home with fantastic Aurora photographs.
Happy chasing and clear skies!
GET YOUR FREE EBOOK!
- PHOTOGRAPHING THE NORTHERN LIGHTS -
BEST SETTINGS, GEAR, PLANNING, TIPS, AND MORE!


I am planning an Iceland trip next Sept/October for a Lights “safari”. Your listing of lens is outstanding but unfortunately most out of my price range. I have an array of lens currently for my SL3 Canon. The lens 18mm-55mm F3.5, 75mm-300mm at f4, and of course my oldest lens a 1.8f 50mm (30 years old). In the order criticality what is most important. I am looking at EF-S 24mm, 2.8f Canon lens for this trip but want to buy something I can use for Milkway shots in my home state of Michigan.
Hi Jonathan, the Canon 24mm f2.8 is for sure a great lens for both aurora and milky way. I think that’s a good option with an affordable price, you won’t regret.
Best,
Dan
Great article, I’m not in a “high probability zone” to see aurora, but KP index just hit a peak and I did saw some yesterday.
Grabbed my D5500 and tried a few shot, set a few “random” setting and did got one that was not too bad (great knowing my experience)
But I’m getting all primed up for tonight, hoping to be able to redo it, better!
And now, with your information, I am better equip to make it great!
Thanks for sharing!
Take care,
Alex
Nice, Alex! Hope you can capture some amazing Northern Lights shots!
Hi Dan,
I enjoyed reading this detailed article on photographing the northern with a good professional camera. I was wondering if you would consider updating it with a similar level of detail for those who have smartphones and don’t want to purchase another camera.
Liam, it’s on our list to do a detailed iphone Northern Lights photography article!
Great article! Heading to Finland (Nellim). Never take Northern Lights photos before so looking forward to it. Have the Sony A7IV and the 20mm 1.8 (great lens for so many things!).
That’s a perfect gear for northern lights!! Hope you took amazing pictures 🙂
excellent help page.
I am off to Antartica next week and hope to capture the Southern lights.
I only have a Nikon D3400 + zoom lens and a wide angled lens.
Will the wide angle lens help and what settings would you recommend as I can only get to F5.6
Thanks
Tony
Tony,
You can only capture the Southern Lights in Antarctica in the winter, when only scientists and special expeditions can get there.
Hi Dan,
I will be going to Iceland this Friday (Nov 19). I had a quick question on composition and focus. If I had (say my wife) and I wanted to have her sharp (prob a silhouette) then I would make her my hyper focal distance correct, just like the church that you have in your picture?
Thanks
Kunal
Kunal,
That will depend on the distance. If you focus on the hyper focal and she’s further, you won’t have any problem. Just make sure she’s still.
Best,
Dan
Im going to use my iphone 12 to take northern light. What setting is good to use?
Mary,
Make sure you have control of the settings with your iPhone. If you have the PRO model you’ll have better results. Just open the aperture as much as you can (f1.2), adjust the exposure (10 seconds) and stay still. Don’t expect much quality.
Best,
Dan
Very helpful article!! I’m planning a trip to Yellowknife Canada in Jan or Feb. I have a Nikon D3200, is there any suggestion to protect the camera in extreme cold weather? Can we take photo with iPhone as well?
Hey Joyee, best tip is try to avoid condensation by leaving the camera inside your camera bag when you arrive to your acommodattion. Bring extra batteries! Yes, ofc you can take photos with your smartphone 😉
Hi Dan,
I’m traveling to Iceland next week and will bring my Sony a6000 with my new Samyang 12mm lens. Do you have any recommendations for lens filters for photographing the Northern Lights?
Thanks!
Jon
Hi Jon,
You don’t need any lens filters to photograph the Northern Lights.
Good luck chasing and photographing the Aurora in Iceland!
Dan
Samsung Galaxy S9 Plus : what is the best setting, for a northern photograph ?
Try to use the maximum aperture and a higher ISO. Exposure time between 4 to 15 seconds if you are using a smartphone like a Samsung S9 Plus 😉
Is there please the paper version of the book???
Guiseppe, I’m afraid that we can only offer the ebook version.
Best,
Dan
Dave,
I like your article.
I am cruising to see The Northern Light off the top of Norway. I have a Sony A7RII and a Sony RX10iv. I guess the A7 would be the better camera, even though my max lens apperture is f4.0 on my zooms, although I have a Sony halfframe f1.8/24mm. Although the RX10 has a max apperture of 2.4, the small capter may be limiting.
What do you think?
By the way, I tried to download your free book, but it didn’t happen.
Thanks, Steve!!
I’d take the Sony A7RII with a good lens for Northern Lights. It’s a better camera than the RX10OIV and it’ll have a better performance in low-light.
Not sure what was the issue but I just sent you my Northern Lights ebook via email 😉
Happy shooting in Norway!
Dan
Hello! I am visiting Iceland in the beginning of January – do you think I’ll have a good shot of seeing the lights on a boat tour? I have a Nikon D3500 that I was debating on bringing – do you think my camera will pick up the lights well? I’m not very advanced, but am hoping to get at least one good shot. I saw your mention that smart phones don’t do the lights justice, so I think this might be a better option than my iphone. Your article was so helpful! Thank you for taking the time to publicize this.
Hi Roberta,
You can certainly get a Northern Lights picture with your camera. It’s not the best camera for shooting at night but if your are not aiming at getting a top quality image and just want to shoot some memories it’ll work out 😉
The only thing that I wouldn’t suggest for shooting the lights is doing it from a boat. You need a tripod and stability as commented on the article and that’s impossible from a boat.
Wish you all the best in your Northern Lights chasing experience!
Best,
Dan
Hi Dan,
Thanks for all the tips! I’ll visit Lofoten Islands in late May for the first time. I can’t wait. I’m thinking of making another trip later in the year for the northern lights. Do you consider having a photo tour there in November instead of February? February is a bit too cold for me. I’m looking at mid-October or mid-November instead. What do you think of the photo opportunities then?
Also, in your tips, you say we should adjust the screen brightness down. I’ve never done it before. How do I do that? I use a Canon 5D Mark III. I’ve not been successful taking night shots so your tips are great. I’d like to try it on a northern light trip.
Thanks.
Hi JC,
Just replied to your queries on an email 😉
Best,
Dan
Regarding exposure…do you expose to the right as in the daylight?
If you have foreground rocks on a beach, for example, where do you focus so the whole depth is in focus? What would your settings be?
Hey Dave,
As night photography, the histogram tends to the left, but everything depends on the light of the scene.
The key is not clipping the blacks while maintaining the texture in the Aurora. Very often you will need to raise your ISO higher than usual to get this result.
As for the focus I usually expose to the infinite. If there is any interesting foreground just focus to the hyperfocal distance.
If I want to emphasize and get a very close foreground I do a focal and exposure blend; focusing on the foreground while doing a longer exposure and closing the aperture, and later a normal shot for the sky blending them together.
The settings depend on the light conditions on the scene but hope this serves as a guidance.
Please let me know if you have any question 😉
Best,
Dan